Otoroshi tunnels
this feature is EXPERIMENTAL and might not work as expected.
If you encounter any bugs, please fill an issue, it will help us a lot :)
Sometimes, exposing apis that lives in our private network can be a nightmare, especially from a networking point of view. With otoroshi tunnels, this is now trivial, as long as your internal otoroshi (that lives inside your private network) is able to contact an external otoroshi (exposed on the internet).
You have to enable cluster mode (Leader or Worker) to make this feature work. As this feature is experimental, we only support simple http request right now. Server Sent Event and Websocket request are not supported at the moment.
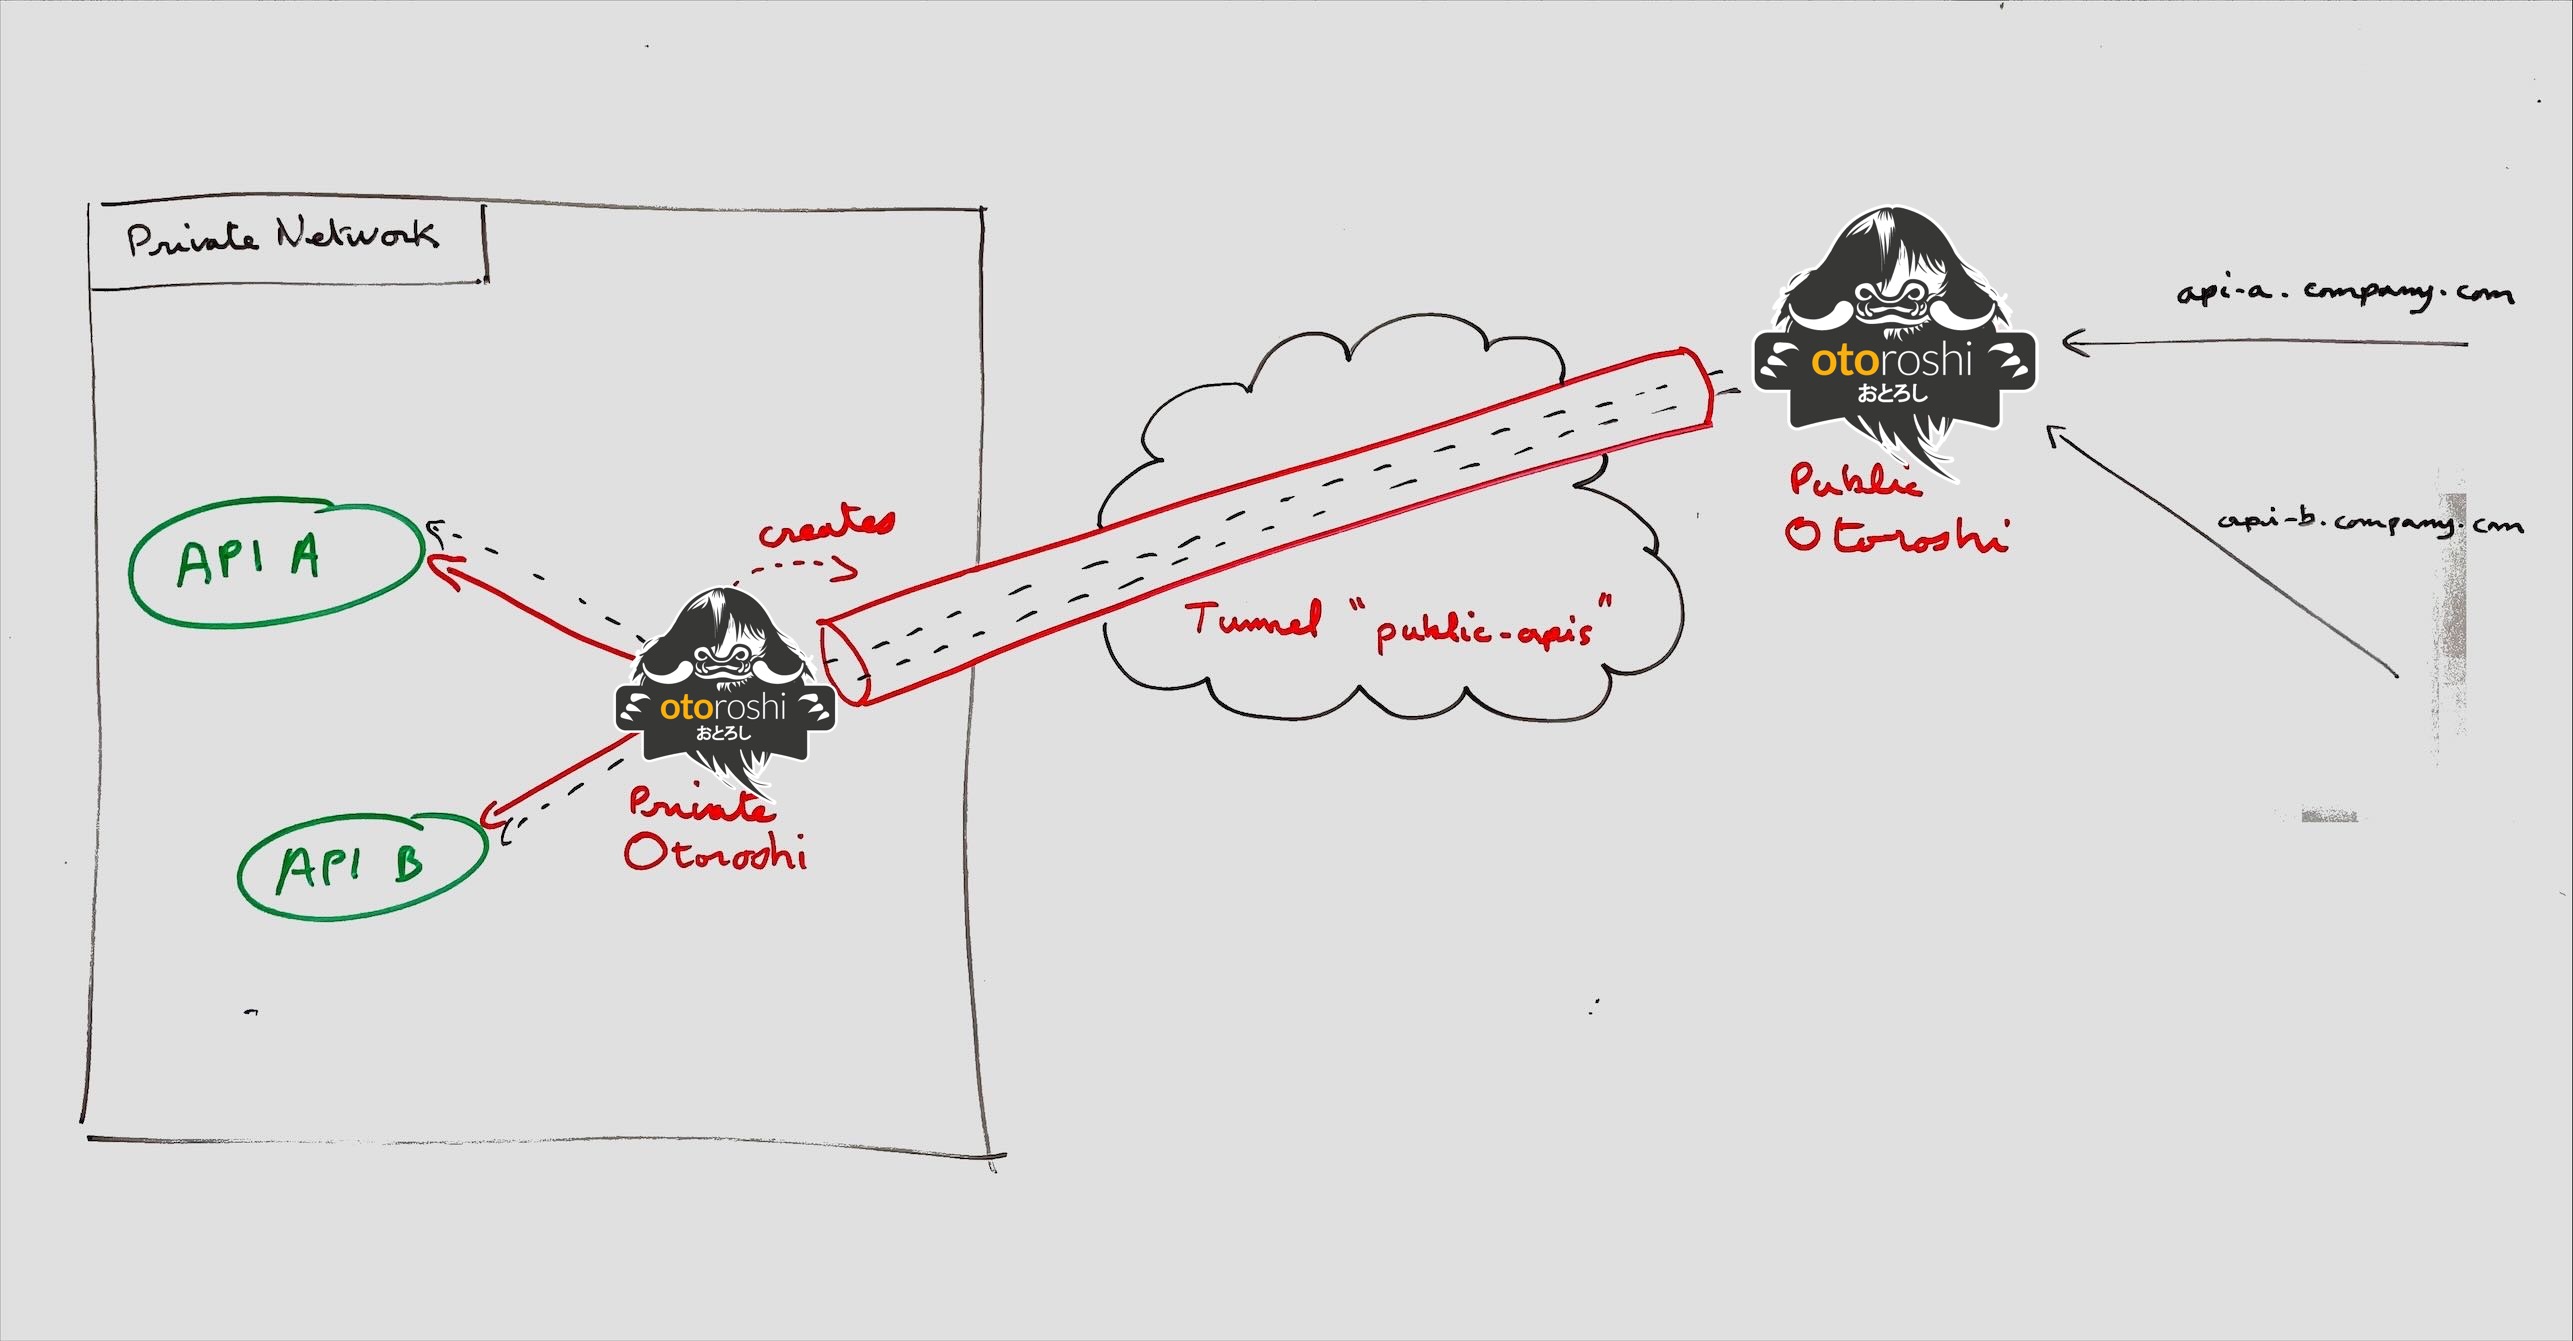
How Otoroshi tunnels works
the main idea behind otoroshi tunnels is that the connection between your private network et the public network is initiated by the private network side. You don’t have to expose a part of your private network, create a DMZ or whatever, you just have to authorize your private network otoroshi instance to contact your public network otoroshi instance.
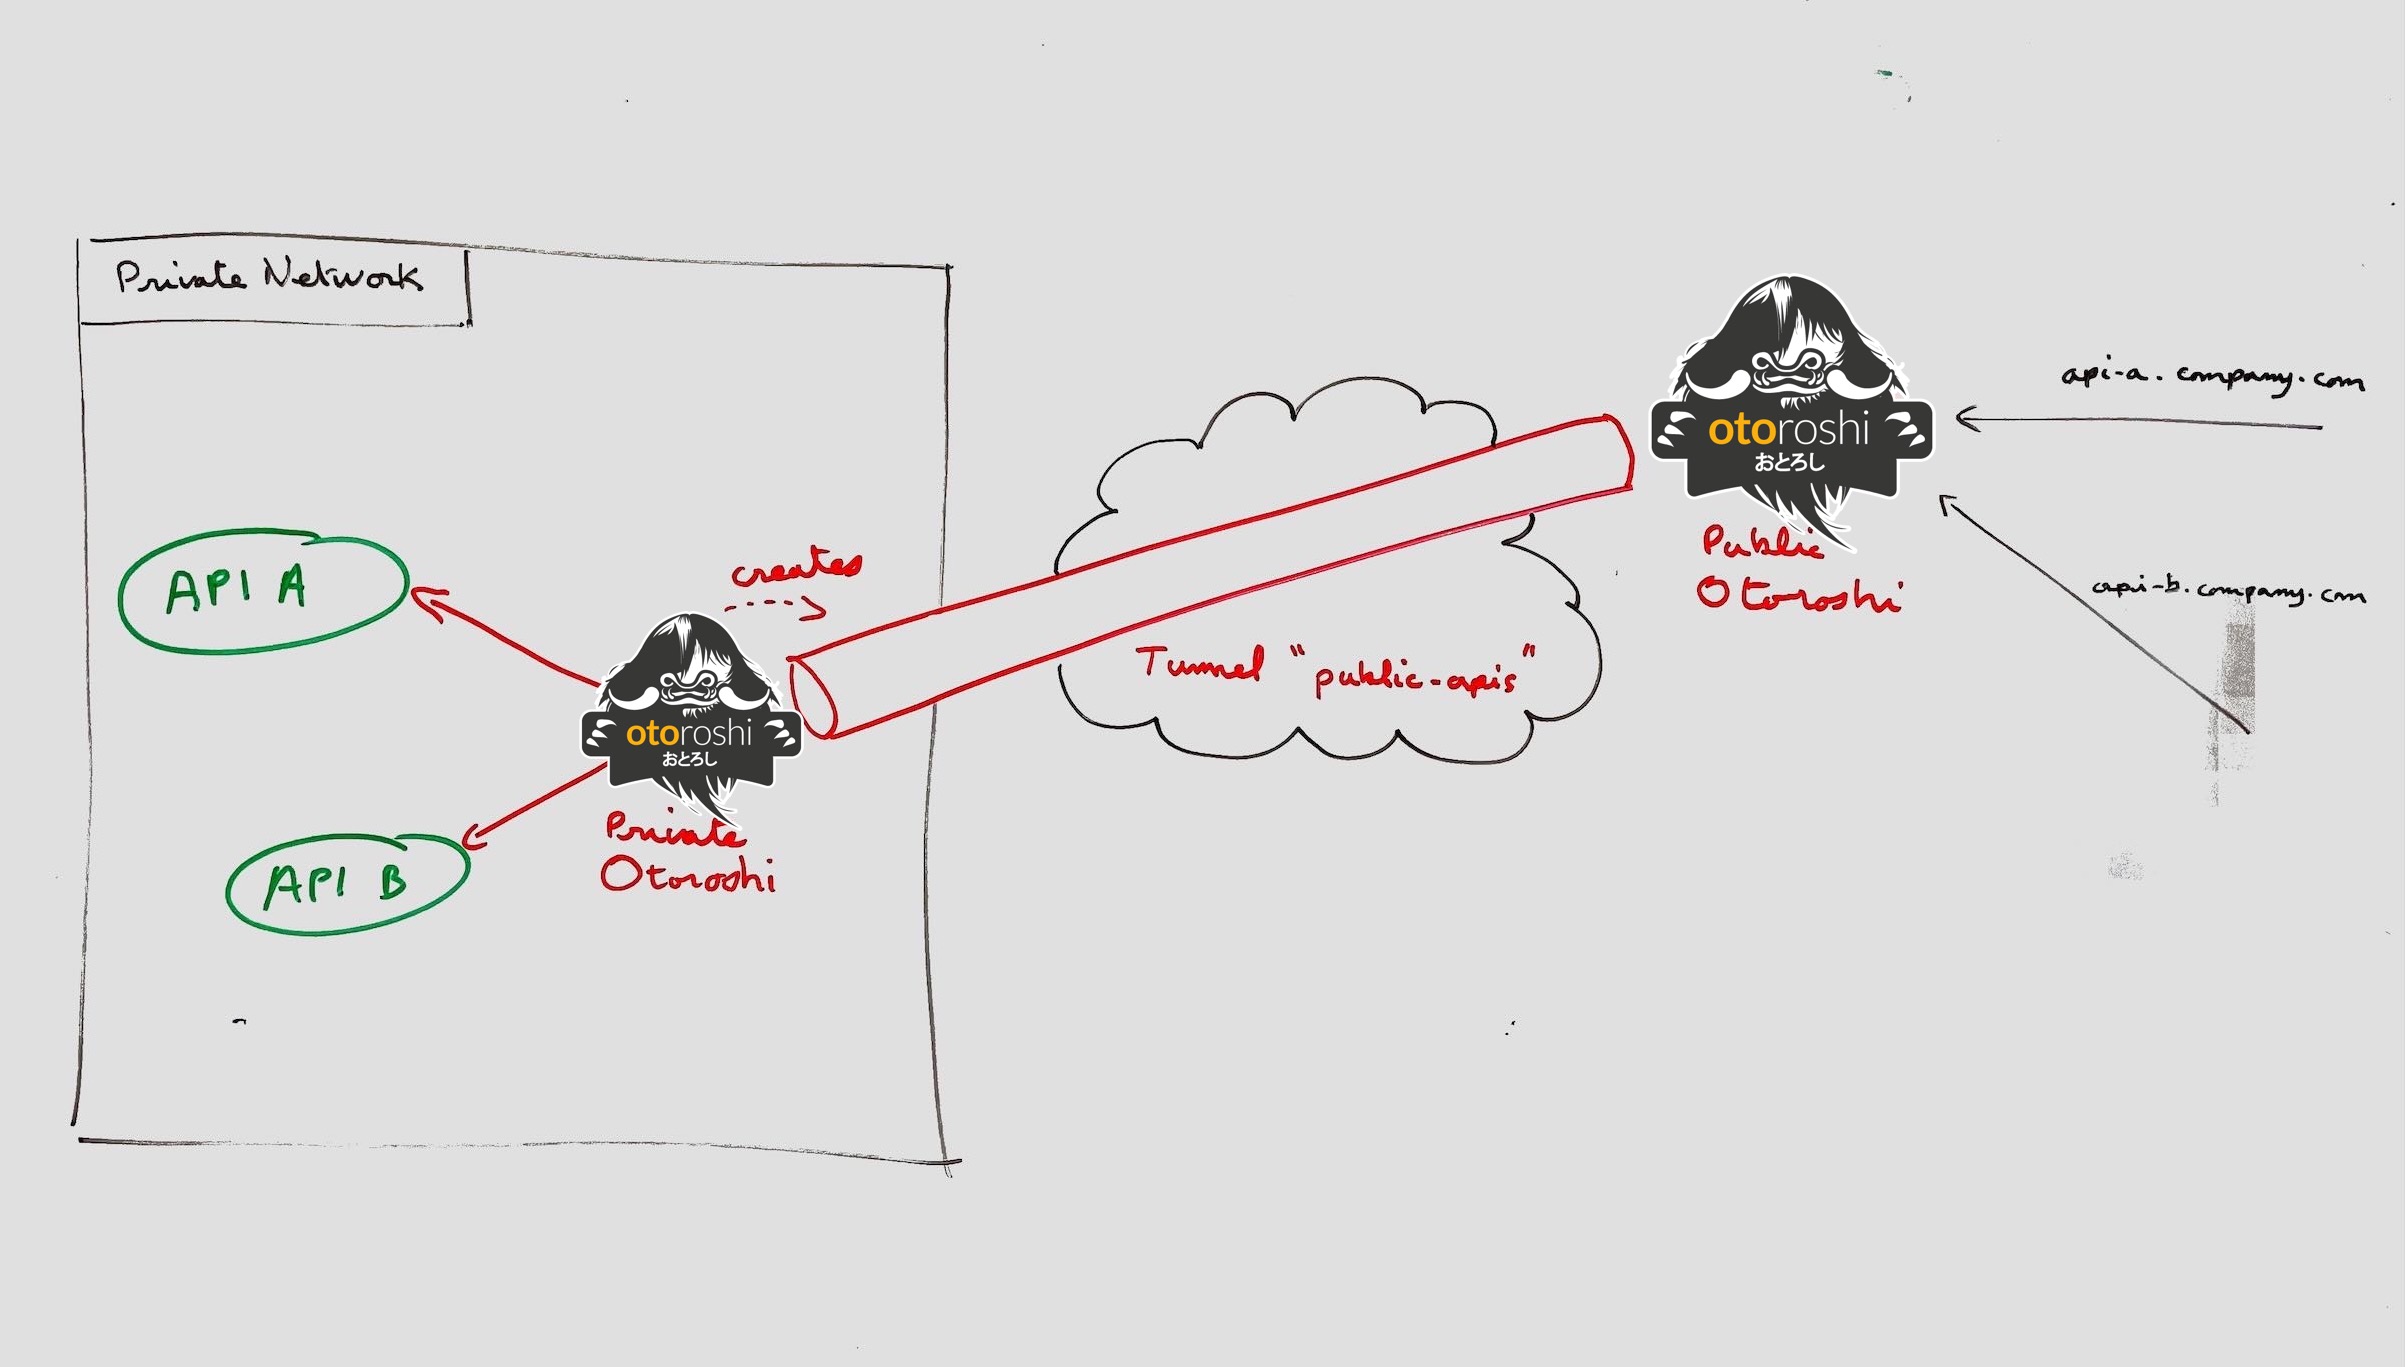
once the persistent tunnel has been created, you can create routes on the public otoroshi instance that uses the otoroshi Remote tunnel calls to target your remote routes through the designated tunnel instance
this feature may introduce additional latency as the call passes through otoroshi tunnels
Otoroshi tunnel example
first you have to enable the tunnels feature in your otoroshi configuration (on both public and private instances)
otoroshi {
  ...
  tunnels {
    enabled = true
    enabled = ${?OTOROSHI_TUNNELS_ENABLED}
    ...
  }
}
then you can setup a tunnel instance on your private instance to contact your public instance
otoroshi {
  ...
  tunnels {
    enabled = true
    ...
    public-apis {
      id  = "public-apis"
      name = "public apis tunnel"
      url = "https://otoroshi-api.company.com:443"
      host = "otoroshi-api.company.com"
      clientId = "xxx"
      clientSecret = "xxxxxx"
      # ipAddress = "127.0.0.1" # optional: ip address of the public instance admin api
      # tls { # optional: TLS settings to access the public instance admin api
      #   ...
      # }
      # export-routes = true # optional: send routes information to remote otoroshi instance to facilitate remote route exposition
      # export-routes-tag = "tunnel-exposed" # optional: only send routes information if the route has this tag
    }
  }
}
Now when your private otoroshi instance will boot, a persistent tunnel will be made between private and public instance. Now let say you have a private api exposed on api-a.company.local on your private otoroshi instance and you want to expose it on your public otoroshi instance.
First create a new route exposed on api-a.company.com that targets https://api-a.company.local:443

then add the Remote tunnel calls plugin to your route and set the tunnel id to public-apis to match the id you set in the otoroshi config file
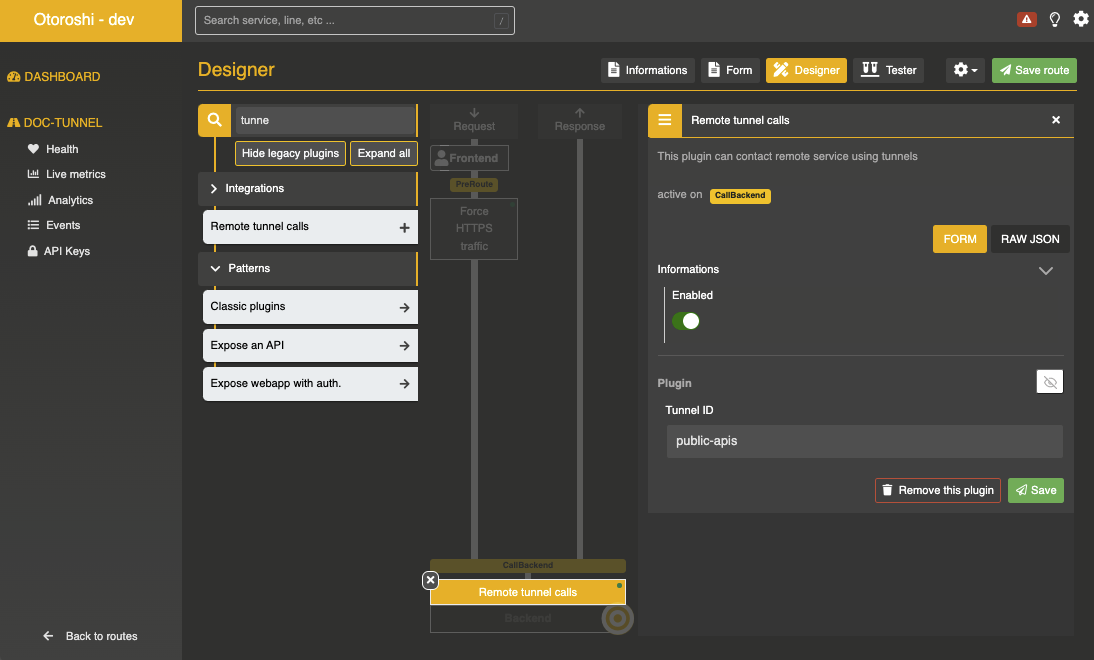
add all the plugin you need to secure this brand new public api and call it
curl "https://api-a.company.com/users" | jq
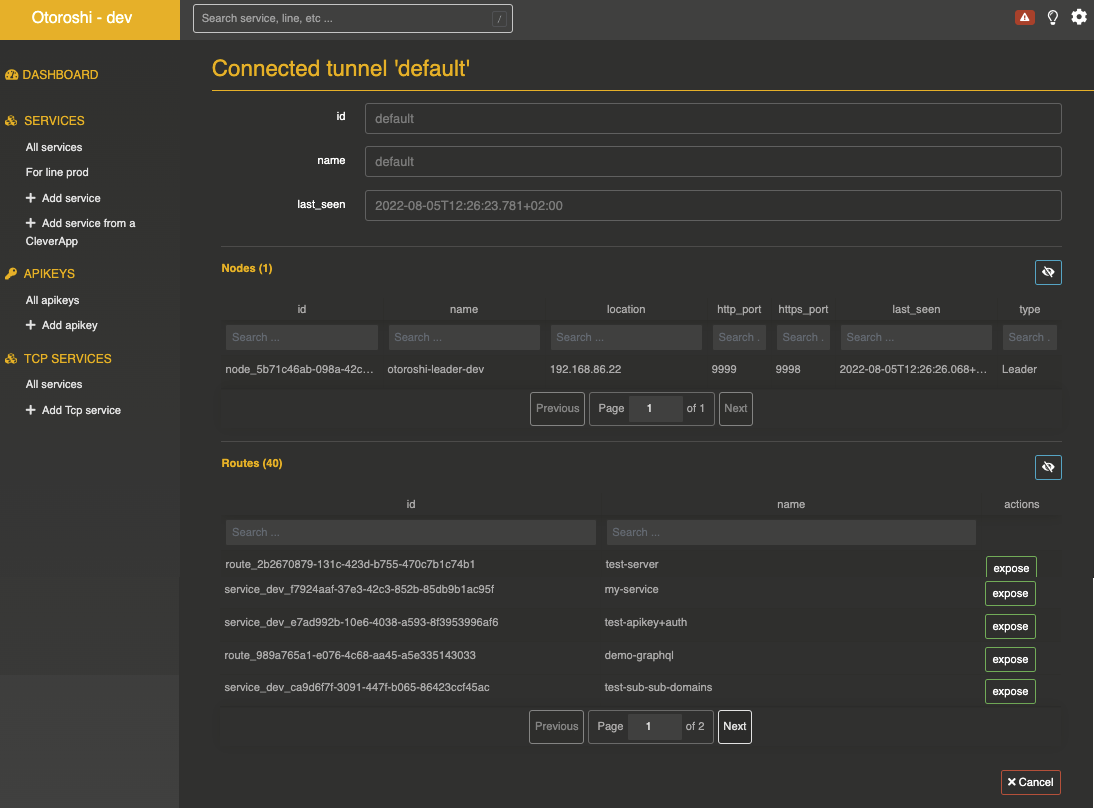
Easily expose your remote services
you can see all the connected tunnel instances on an otoroshi instance on the Connected tunnels (Cog icon / Connected tunnels). For each tunnel instance you will be able to check the tunnel health and also to easily expose all the routes available on the other end of the tunnel. Just clic on the expose button of the route you want to expose, and a new route will be created with the Remote tunnel calls plugin already setup.