Secure an api with jwt verifiers
A Jwt verifier is the guard that verifies the signature of tokens in requests.
A verifier can obvisouly verify or generate.
Before you start
If you already have an up and running otoroshi instance, you can skip the following instructions
Let’s start by downloading the latest Otoroshi.
curl -L -o otoroshi.jar 'https://github.com/MAIF/otoroshi/releases/download/v17.13.0/otoroshi.jar'
then you can run start Otoroshi :
java -Dotoroshi.adminPassword=password -jar otoroshi.jar
Now you can log into Otoroshi at http://otoroshi.oto.tools:8080 with admin@otoroshi.io/password
Create a new route, exposed on http://myservice.oto.tools:8080, which will forward all requests to the mirror https://request.otoroshi.io. Each call to this service will returned the body and the headers received by the mirror.
curl -X POST 'http://otoroshi-api.oto.tools:8080/api/routes' \
-H "Content-type: application/json" \
-u admin-api-apikey-id:admin-api-apikey-secret \
-d @- <<'EOF'
{
  "name": "my-service",
  "frontend": {
    "domains": ["myservice.oto.tools"]
  },
  "backend": {
    "targets": [
      {
        "hostname": "request.otoroshi.io",
        "port": 443,
        "tls": true
      }
    ]
  }
}
EOF
Your first jwt verifier
Let’s start by validating all incoming request tokens tokens on our simple route created in the Before you start section.
- Navigate to the simple route
- Search in the list of plugins and add the
Jwt verification onlyplugin on the flow - Click on
Start by select or create a JWT Verifier - Create a new JWT verifier
- Set
simple-jwt-verifierasName - Select
Hmac + SHAasAlgo(for this example, we expect tokens with a symetric signature),512asSHA sizeandotoroshiasHMAC secret - Confirm the creation
Save your route and try to call it
curl -X GET 'http://myservice.oto.tools:8080/' --include
This should output :
{
    "Otoroshi-Error": "error.expected.token.not.found"
}
A simple way to generate a token is to use jwt.io. Once navigate, define HS512 as alg in header section and insert otoroshi as verify signature secret.
Once created, copy-paste the token from jwt.io to the Authorization header and call our service.
# replace xxxx by the generated token
curl -X GET \
  -H "X-JWT-Token: xxxx" \
  'http://myservice.oto.tools:8080'
This should output a json with X-JWT-Token in headers field. Its value is exactly the same as the passed token.
{
  "method": "GET",
  "path": "/",
  "headers": {
    "host": "request.otoroshi.io",
    "X-JWT-Token": "eyJhbGciOiJIUzUxMiIsInR5cCI6IkpXVCJ9.eyJzdWIiOiIxMjM0NTY3ODkwIiwibmFtZSI6IkpvaG4gRG9lIiwiaWF0IjoxNTE2MjM5MDIyfQ.ipDFgkww51mSaSg_199BMRj4gK20LGz_czozu3u8rCFFO1X20MwcabSqEzUc0q4qQ4rjTxjoR4HeUDVcw8BxoQ",
    ...
  }
}
Verify and generate a new token
An other feature is to verify the incomings tokens and generate new ones, with a different signature and claims.
Let’s start by extending the previous verifier.
- Jump to the
Verif Strategyfield and selectVerify and re-sign JWT token. - Edit the name with
jwt-verify-and-resign - Remove the default field in
Verify token fieldsarray - Change the second
Hmac secretinRe-sign settingssection withotoroshi-internal-secret - Save your verifier.
Note : the name of the verifier doesn’t impact the identifier. So you can save the changes of your verifier without modifying the identifier used in your call.
# replace xxxx by the generated token
curl -X GET \
  -H "Authorization: xxxx" \
  'http://myservice.oto.tools:8080'
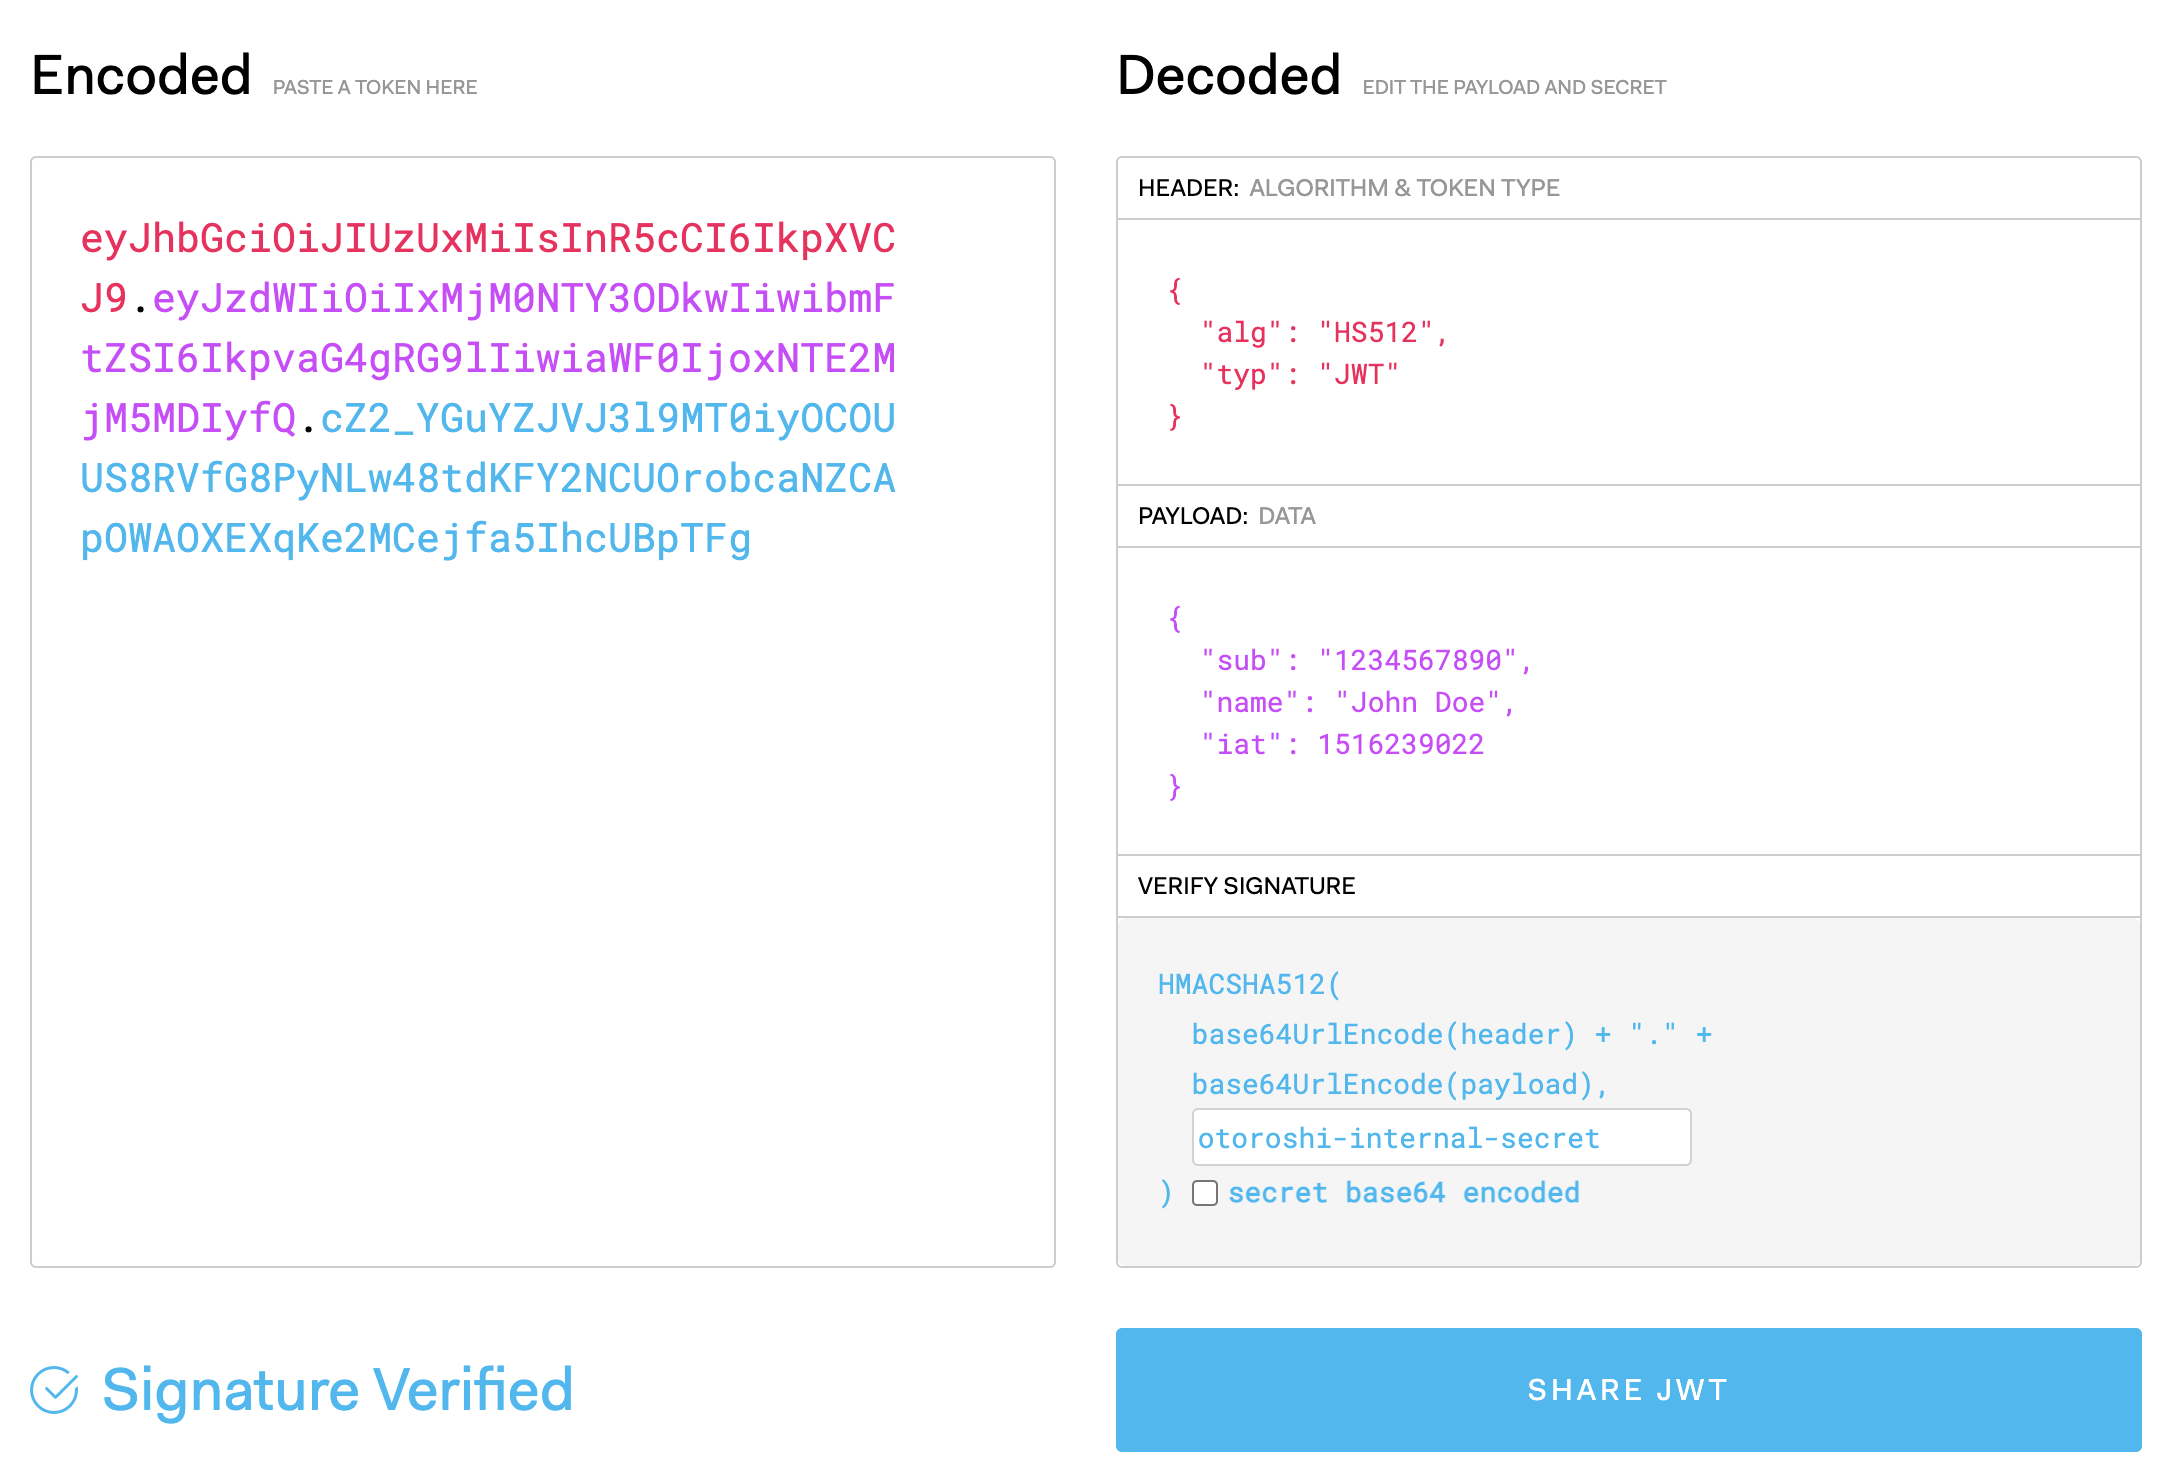
This should output a json with authorization in headers field. This time, the value are different and you can check his signature on jwt.io (the expected secret of the generated token is otoroshi-internal-secret)
Verify, transform and generate a new token
The most advanced verifier is able to do the same as the previous ones, with the ability to configure the token generation (claims, output header name).
Let’s start by extending the previous verifier.
-
Jump to the
Verif Strategyfield and selectVerify, transform and re-sign JWT token. -
Edit the name with
jwt-verify-transform-and-resign - Remove the default field in
Verify token fieldsarray - Change the second
Hmac secretinRe-sign settingssection withotoroshi-internal-secret - Set
Internal-AuthorizationasHeader name - Set
keyon first field ofRename token fieldsandfrom-otoroshi-verifieron second field - Set
generated-keyandgenerated-valueasSet token fields - Add
generated_atand${date}as second field ofSet token fields(Otoroshi supports an expression language) - Save your verifier and try to call your service again.
This should output a json with authorization in headers field and our generate token in Internal-Authorization. Once paste in jwt.io, you should have :
You can see, in the payload of your token, the two claims from-otoroshi-verifier and generated-key added during the generation of the token by the JWT verifier.