Handling environnements
When working with multiple environments (dev, QA, production, ...) it's often necessary to have a different feature activation strategy for each of them.
For instance, a feature could be active for everyone in QA environment and disabled in production.
Contexts are a good way to solve this. The idea is to have one context per environment.

When using contexts to model environments, a good practice is to keep "root" activation strategy for production.This way, the production state of the feature is obvious, since it's the state displayed by default in project view.
Create the feature
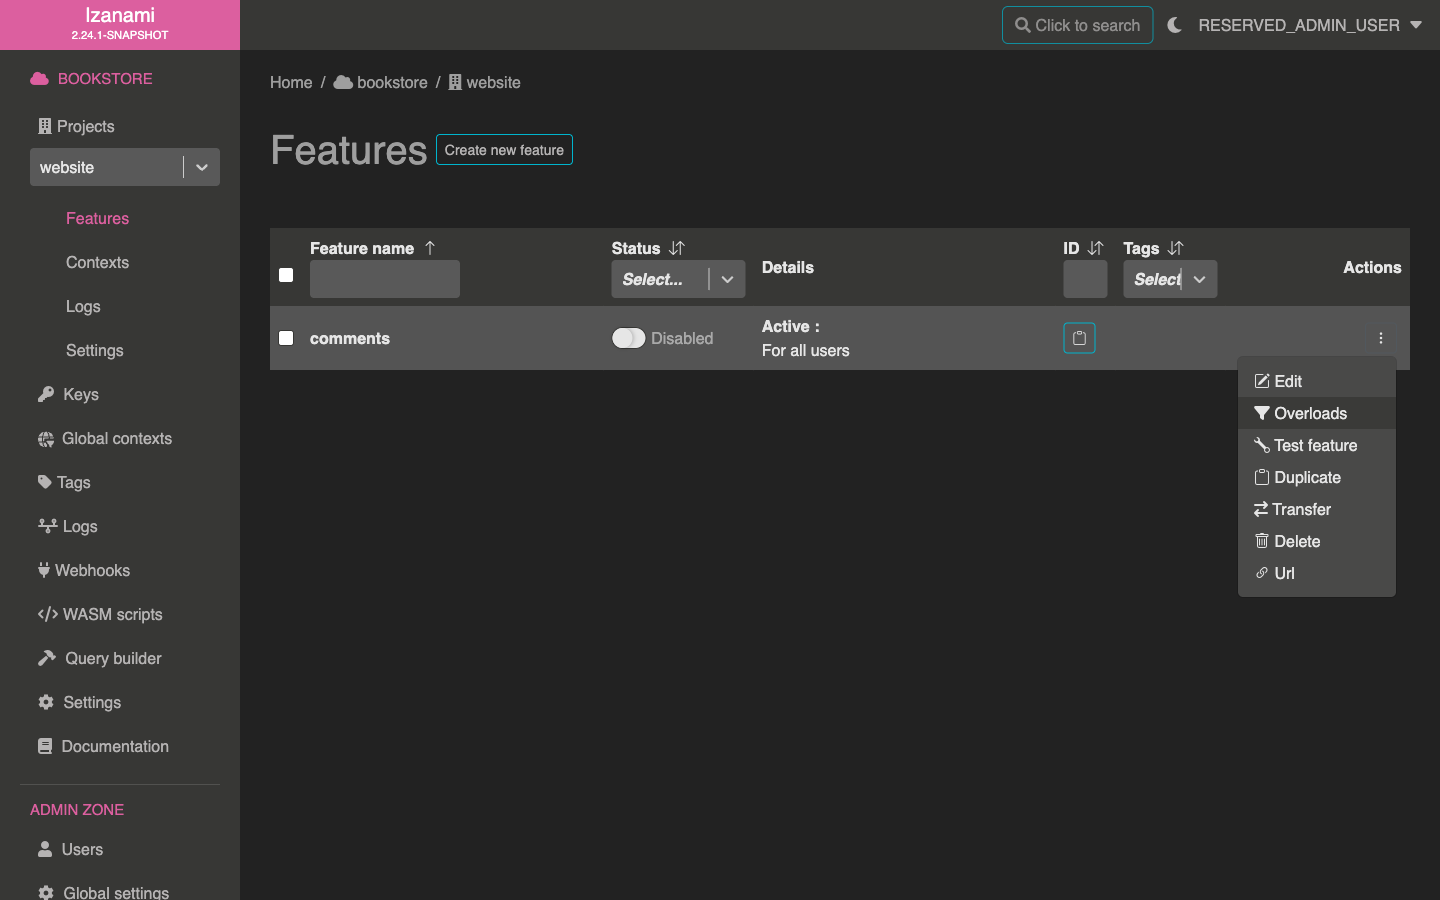
Let's start by creating a feature. In this example, we will assume that our project is a bookstore website and that we want to add possibility to display user comments on books.
Therefore, let's create a comments feature.
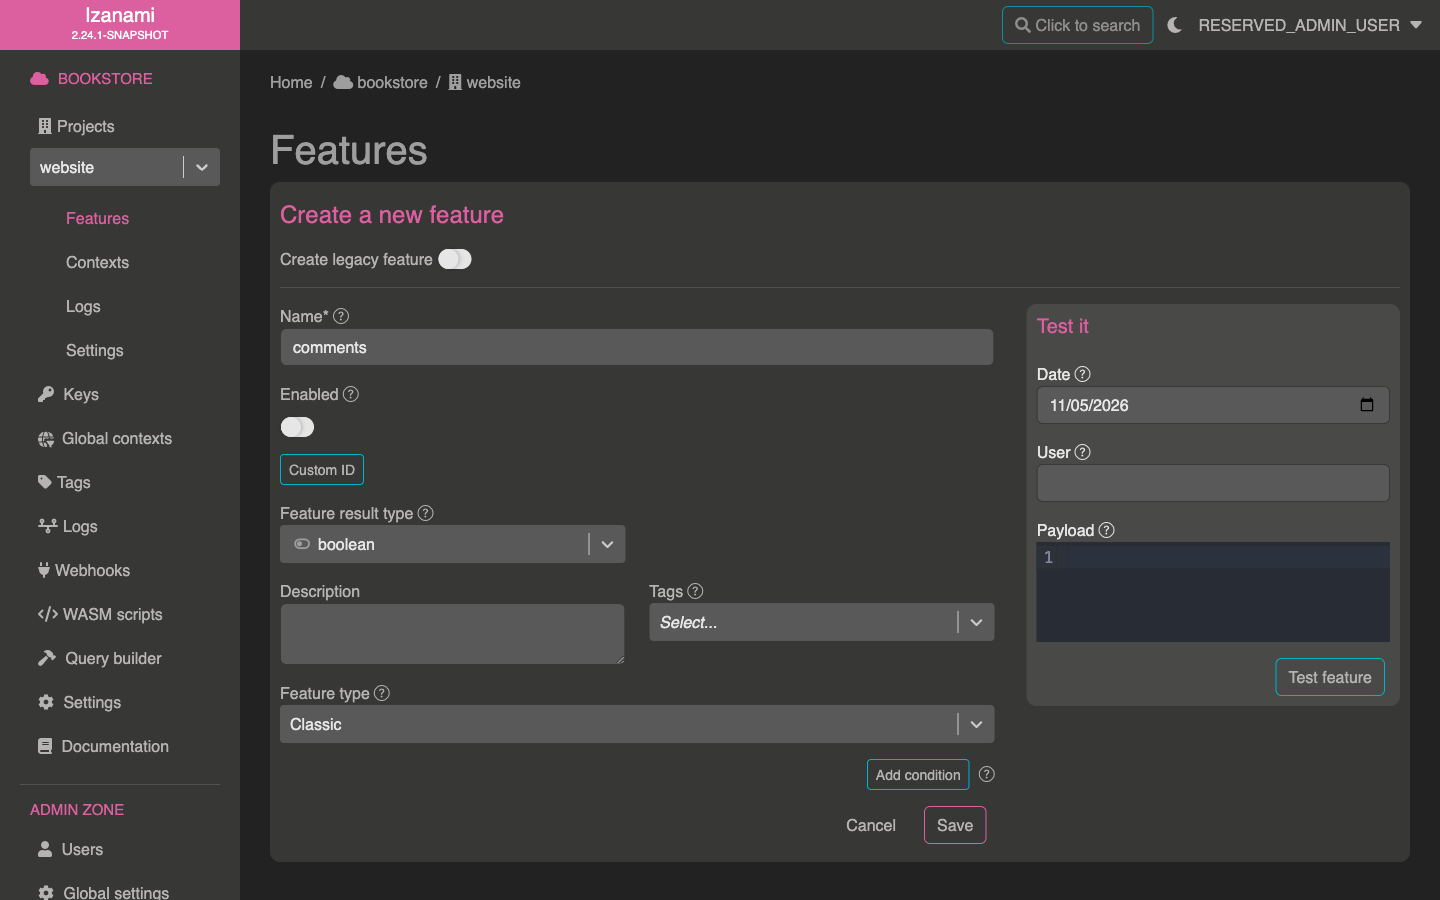
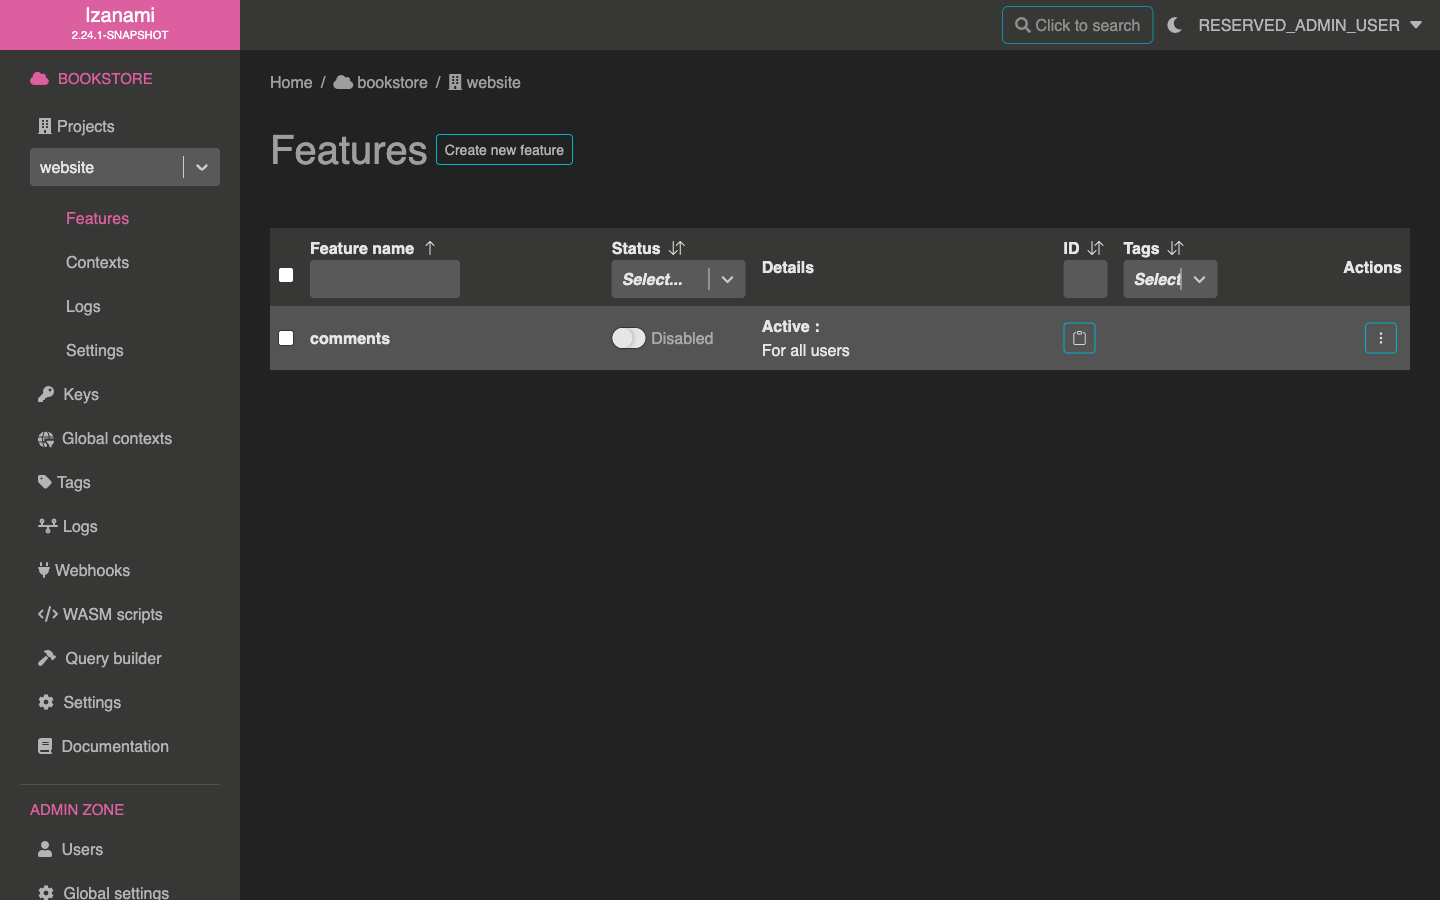
As you can see, we created this feature as disabled by default. This default strategy represents our production environment, since our feature is still in tests, we don't want it to be activated for anyone in production.
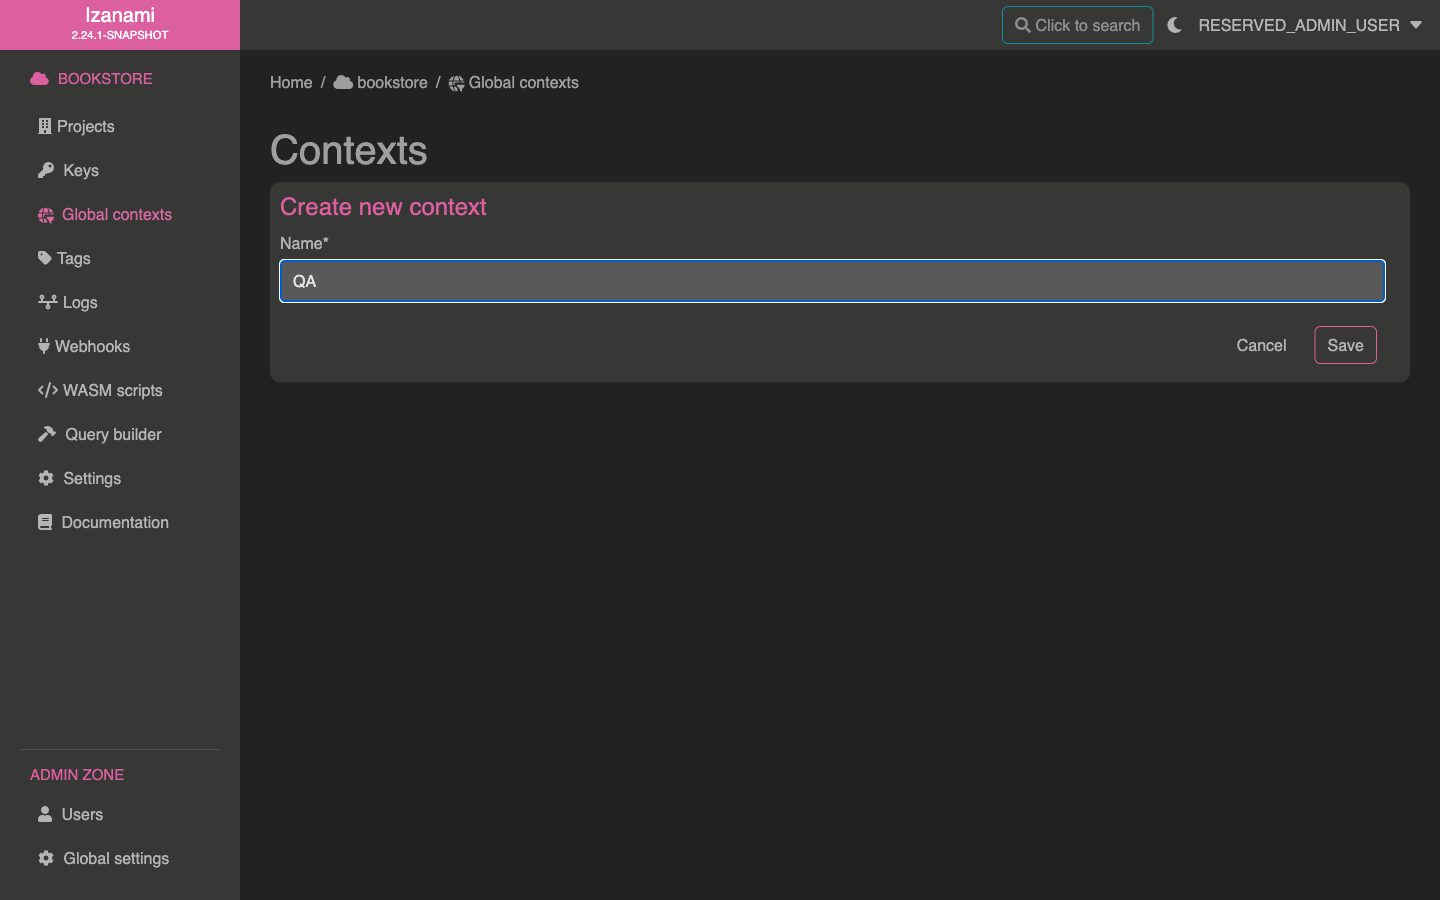
Create a context
We want to activate our comments feature in QA environment, so that it can be tested before activating it to production.
To achieve this, we'll need a QA context, let's create it. We have two choices here :
- Creating a local context, this is useful for creating project specific contexts
- Creating a global context, that could be used by any projects of the tenant
Since QA looks like a generic environment, let's create a global context.
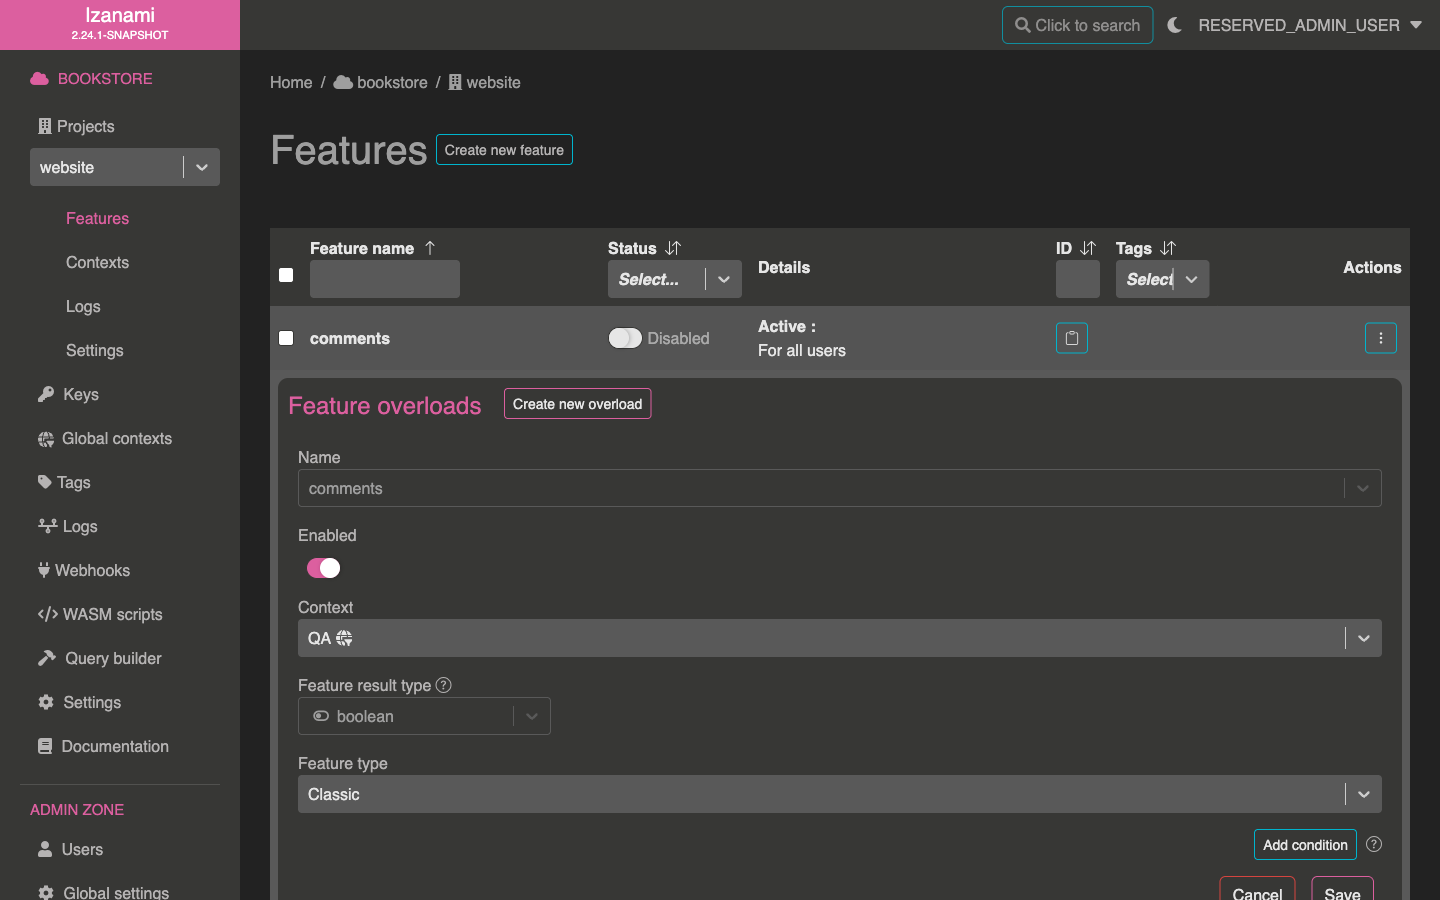
Once our context is created, let's get back to our website project and add an overload for our comments feature.
Select QA context and make sure to check Enabled to activate feature for this context.
Test it
Now let's make sure that our feature is correctly active in QA and inactive in prod.
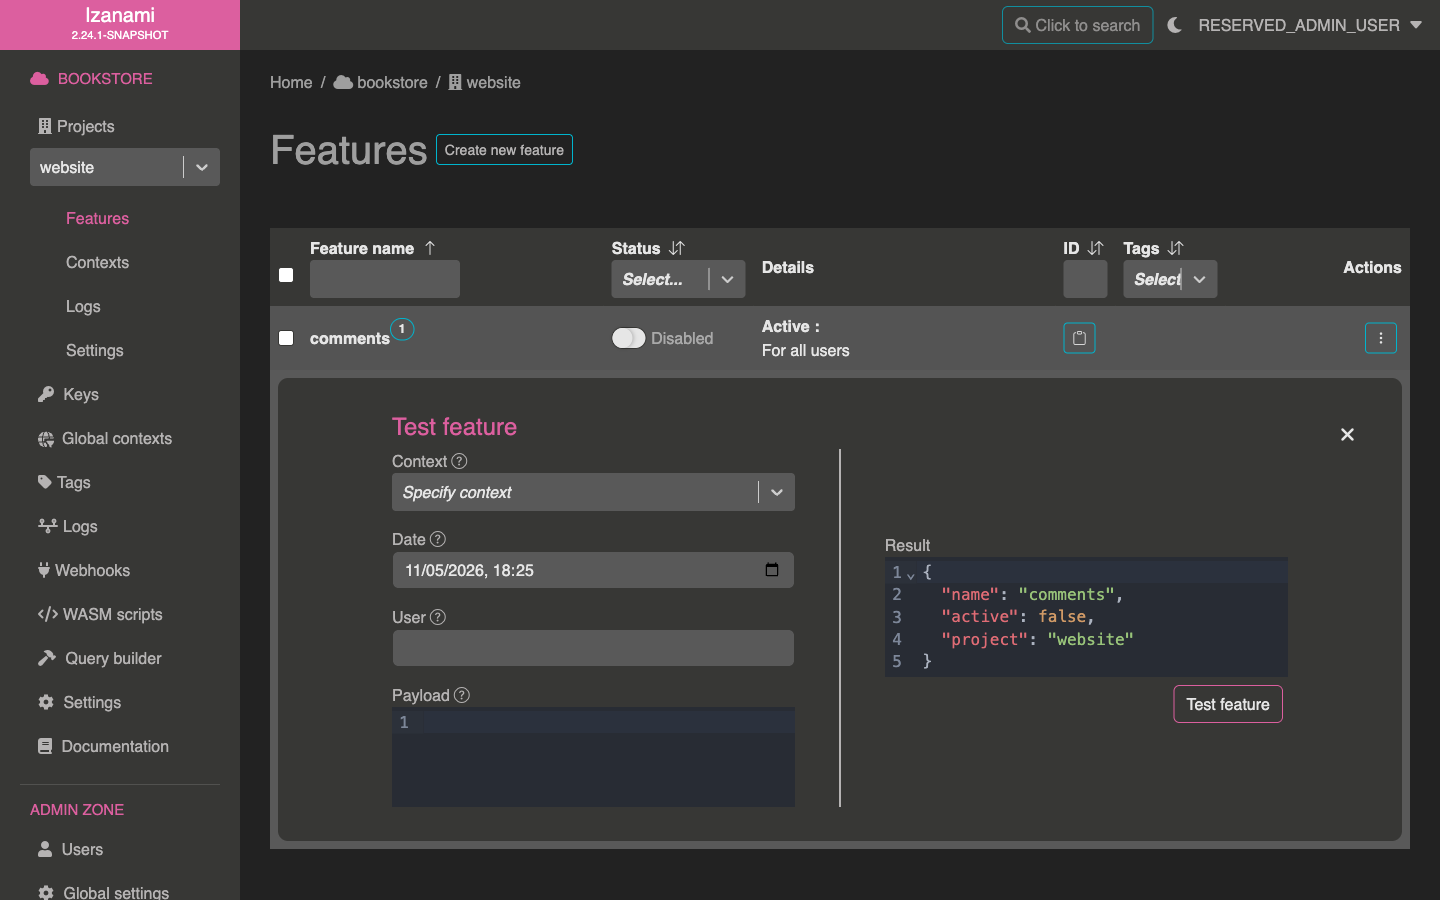
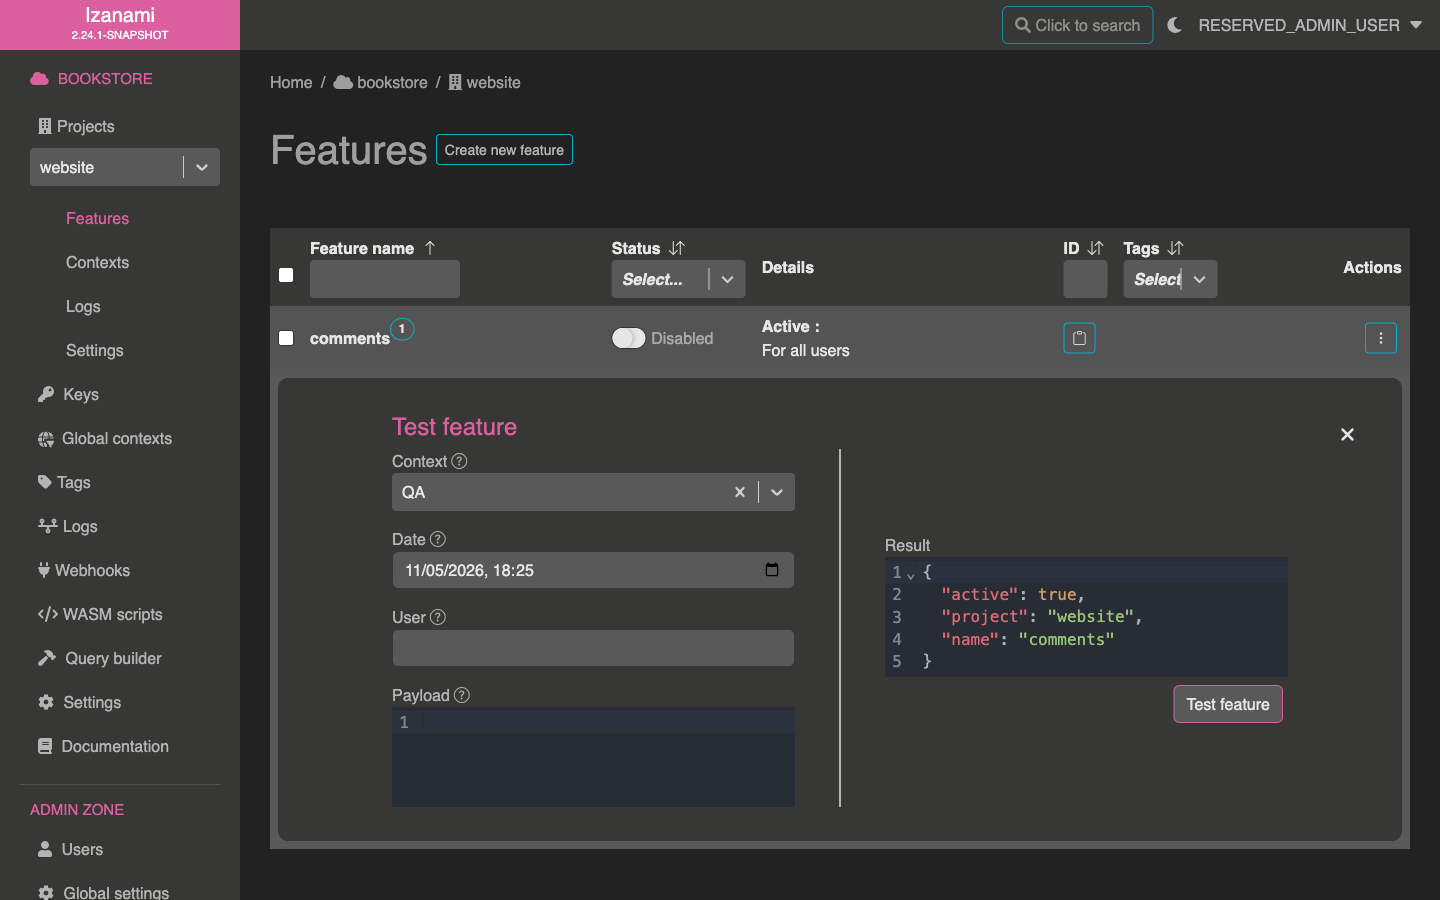
Let's open test form for our feature.

This form allows to test feature state for both QA and root context.
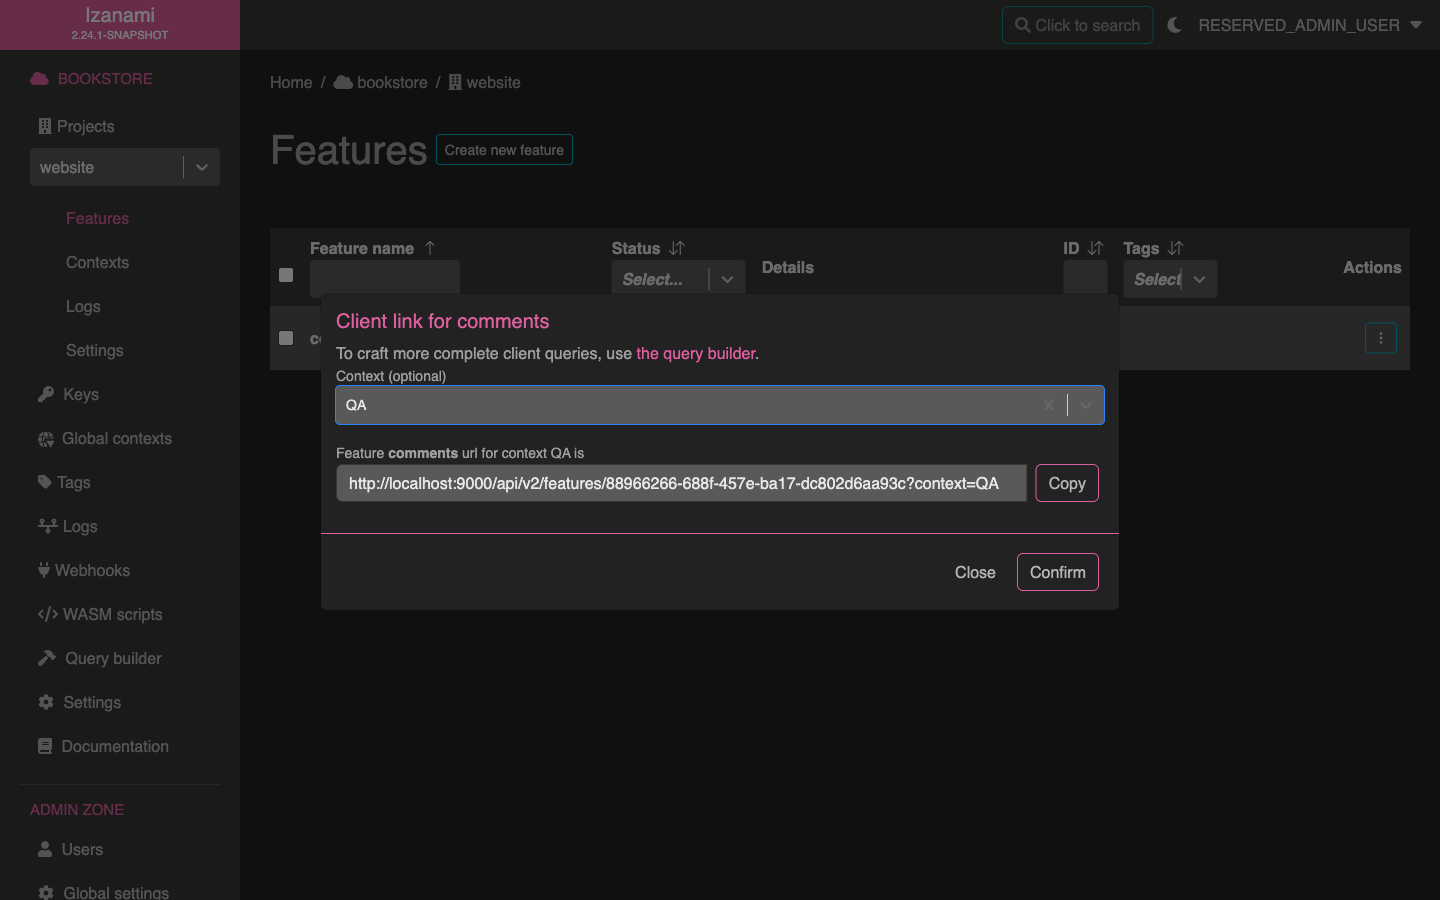
Call it from client application
To indicate context to Izanami, you'll need to add a query parameter to your query. You can either do it manually or make Izanami generate correct URL for you.
To get URL from Izanami, just click on the "URL" button in your project feature table.
A form opens that let you specify context to embed in query. Generated URL is available in the bottom input.