Get started
This guide will help you to:
- Get your first Izanami instance up and running
- Creating your first feature
- Requesting features through HTTP
To cover more advanced topics, either read about core concepts or our guides.
Instantiate Izanami locally
There are several ways to start Izanami.
Using standalone docker image
The simplest way to test Izanami is to use standalone docker image. This image embeds Izanami itself and a postgres database, therefore you don't need any additional setup.
docker run -p 9000:9000 maif/izanami-test-standalone:latest
To keep your data after container is shut down, you can use a volume to store postgres database state:
docker run -p 9000:9000 --volume izanami-demo-db:/var/lib/postgresql/data maif/izanami-test-standalone:latest
Using docker
One solution is to run a postgres DB separately (change IZANAMI_PG_URI to match your database setting).
docker run --env IZANAMI_PG_URI=postgresql://postgres:postgres@host.docker.internal:5432/postgres -p 9000:9000 izanami
Alternatively, you can run following docker-compose file
# Use postgres/example user/password credentials
version: "3.1"

services:
  db:
    image: postgres
    restart: always
    environment:
      POSTGRES_USER: postgres
      POSTGRES_PASSWORD: postgres
      IZANAMI_ADMIN_DEFAULT_USERNAME: izanami
      IZANAMI_ADMIN_DEFAULT_PASSWORD: password
    ports:
      - 5432:5432
  izanami:
    image: maif/izanami:2.7.1
    environment:
      IZANAMI_PG_URI: postgresql://postgres:postgres@host.docker.internal:5432/postgres
    ports:
      - 9000:9000
Using Java
You'll need to run a postgres database to start Izanami. Replace app.pg.uri with your database values.
java -jar \
  -Dapp.admin.username=izanami \
  -Dapp.admin.password=password \
  -Dapp.pg.uri=postgresql://postgres:postgres@localhost:5432/postgres \
  izanami.jar
Logging in
Once Izanami is started, you can browse to http://localhost:9000 and log in with
username izanami and password password (if you used above configuration).
Your first feature
Creating tenant and project
Before creating a feature, you need to create a tenant and a project.
These two organizations levels will help you to keep thing organized
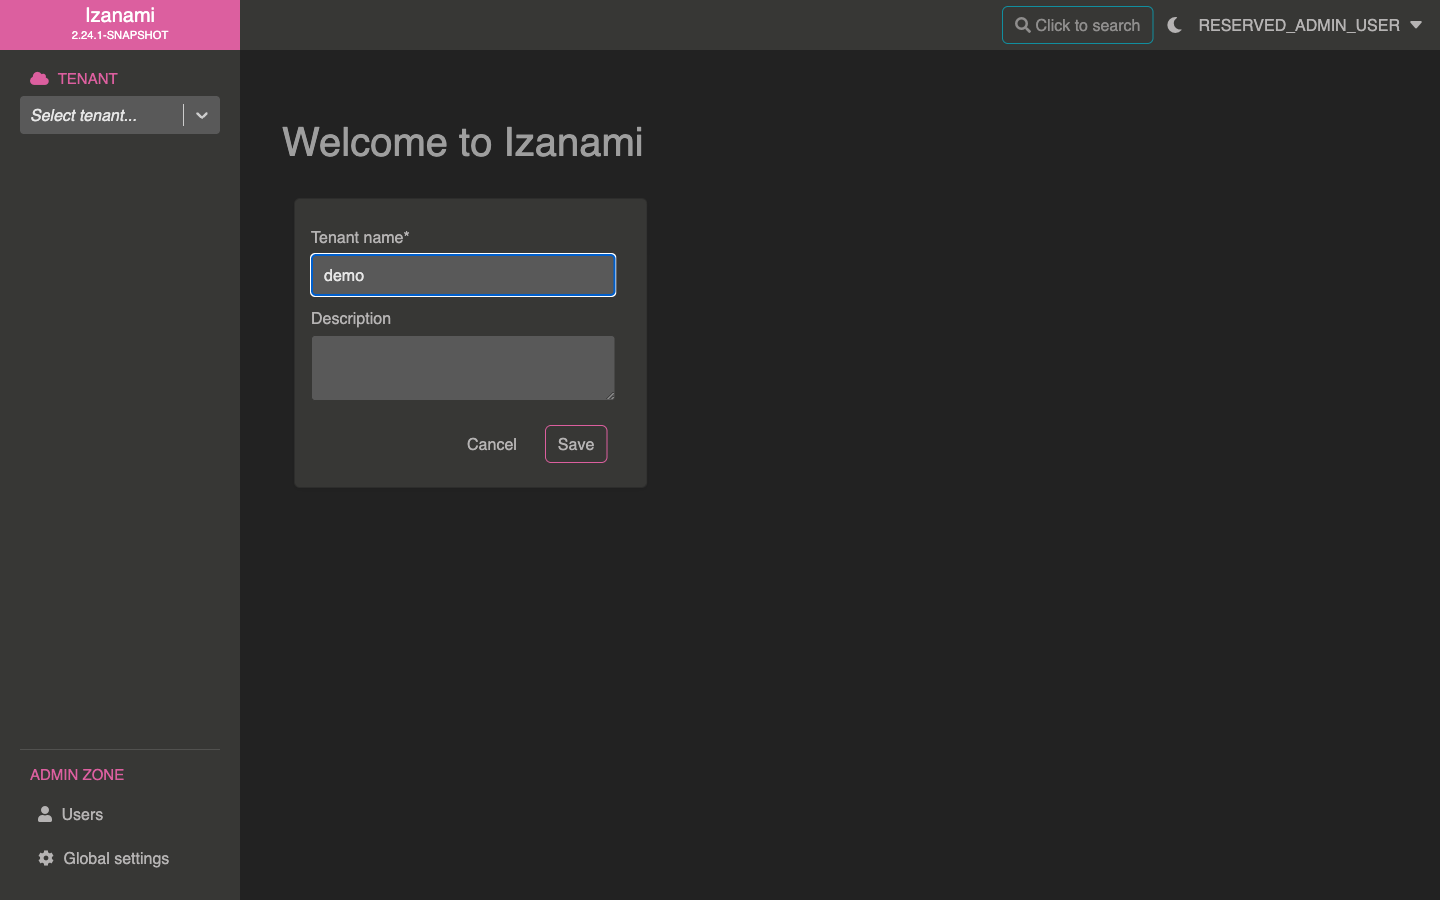
When login in for the first time, Izanami will ask you to create a tenant.
When clicking this button, Izanami will display tenant creation form, tenant name can contain:
- lowercase letters
- numbers
-and_characters
Once tenant is created, Izanami redirects you its page, and indicates that there is no project for this tenant yet.
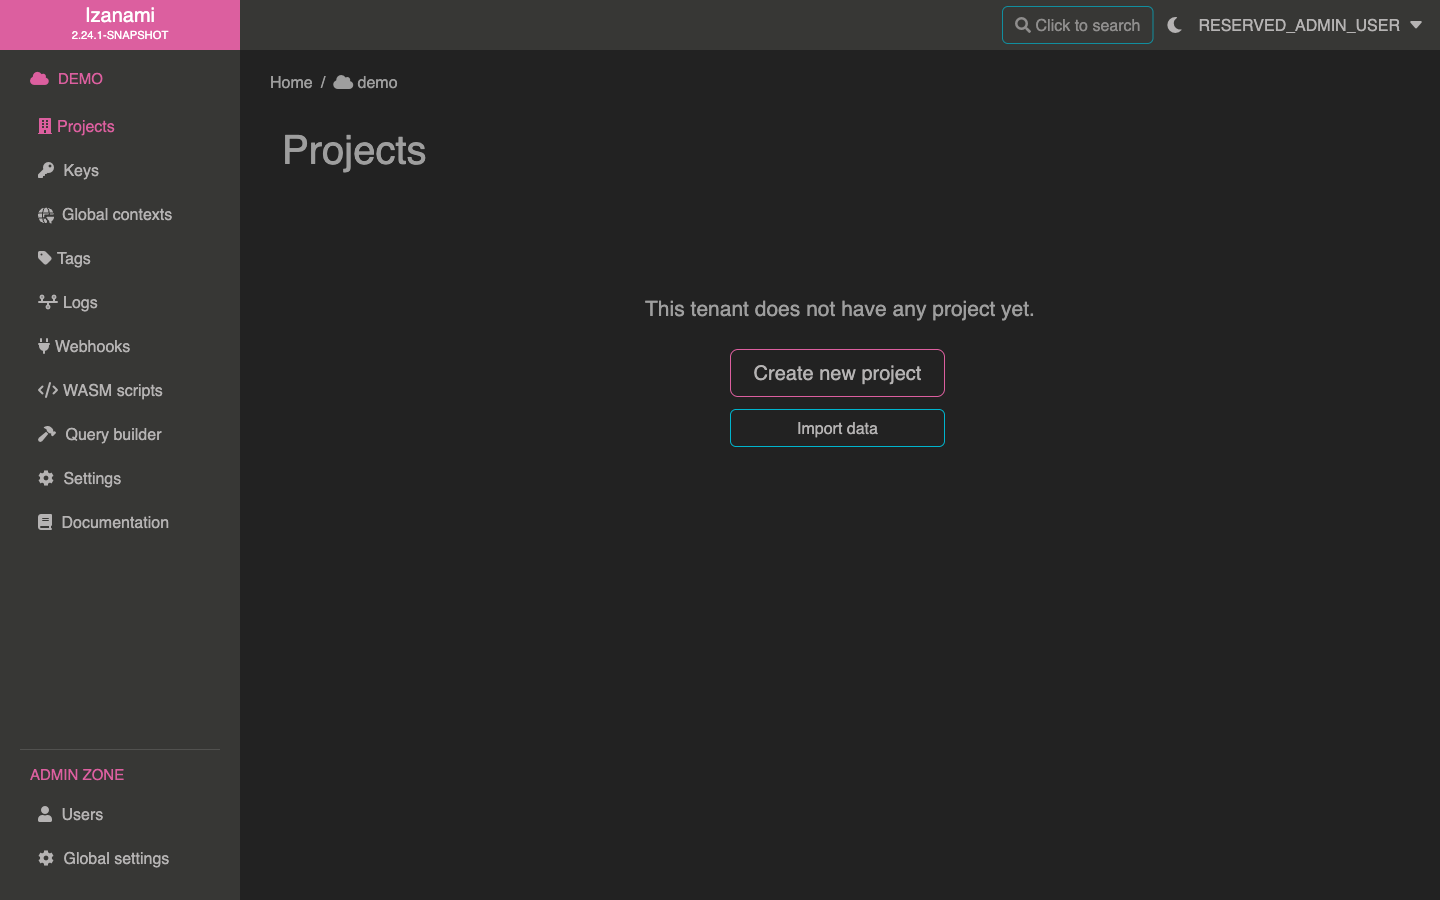
On this screen there are two choices, we can either create a new project from scratch or import data, for this guide we will create a new project. If you're interested in importing data, check the data importing guide.
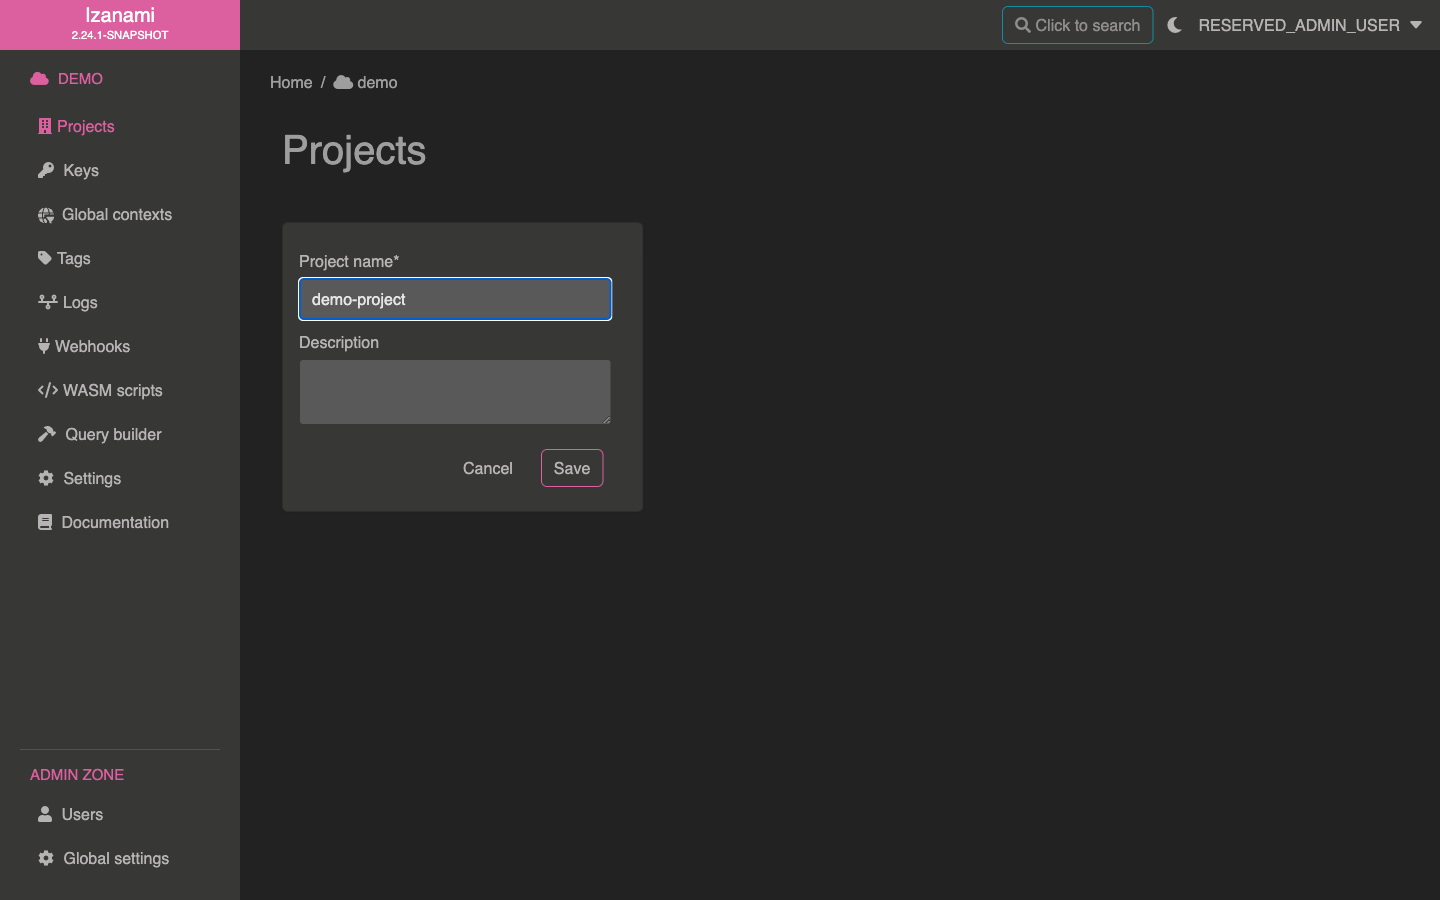
After clicking the creation button, a form is displayed. Project name can contain following symbols :
- letters (uppercase or lowercase)
- numbers
-and_characters
After validating this form, Izanami once again redirects you, this time on the new project page.
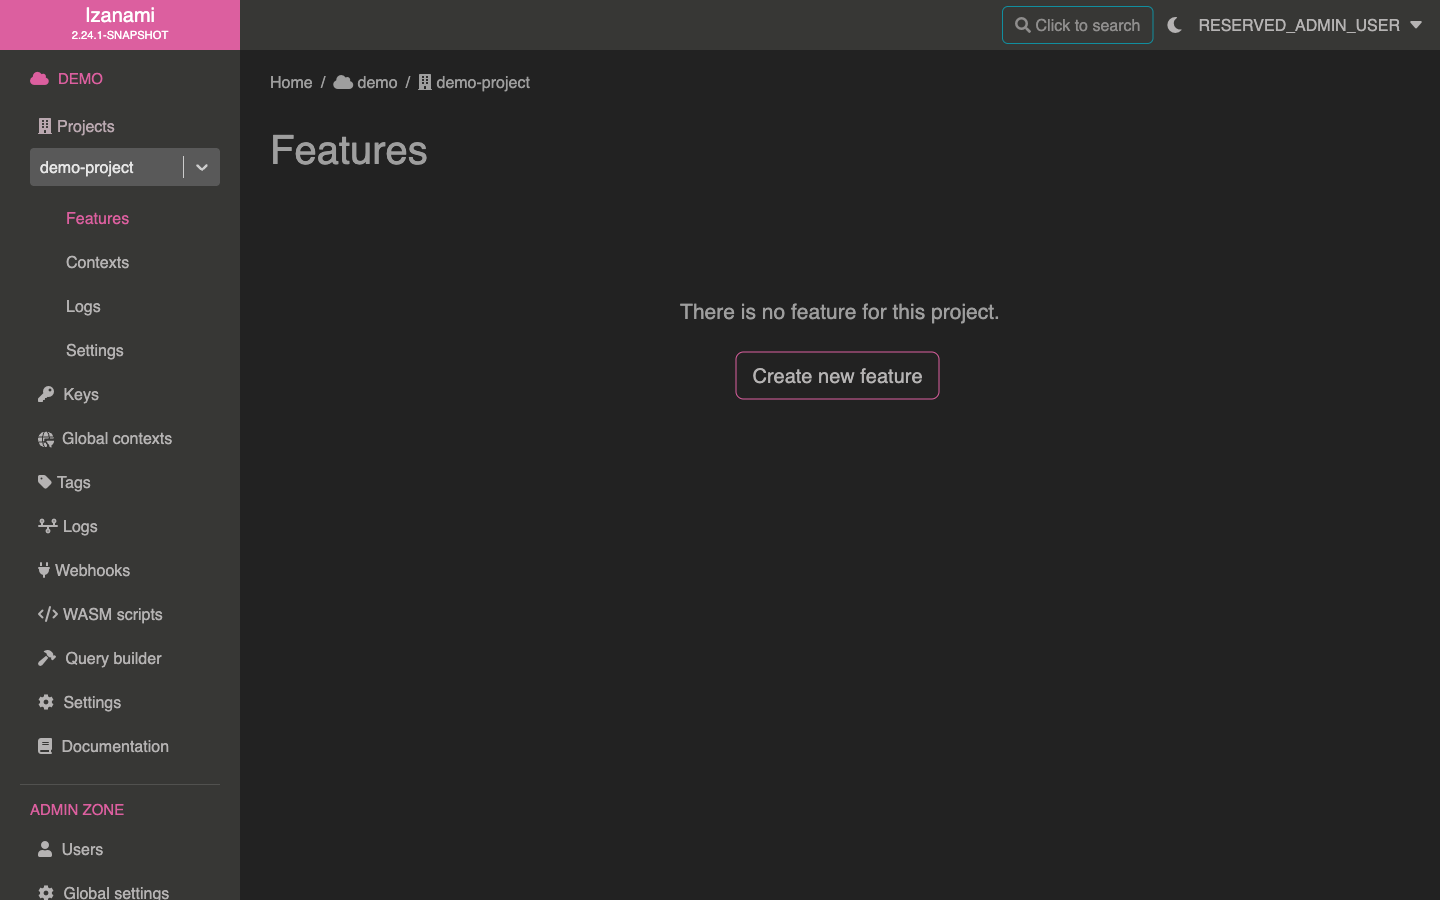
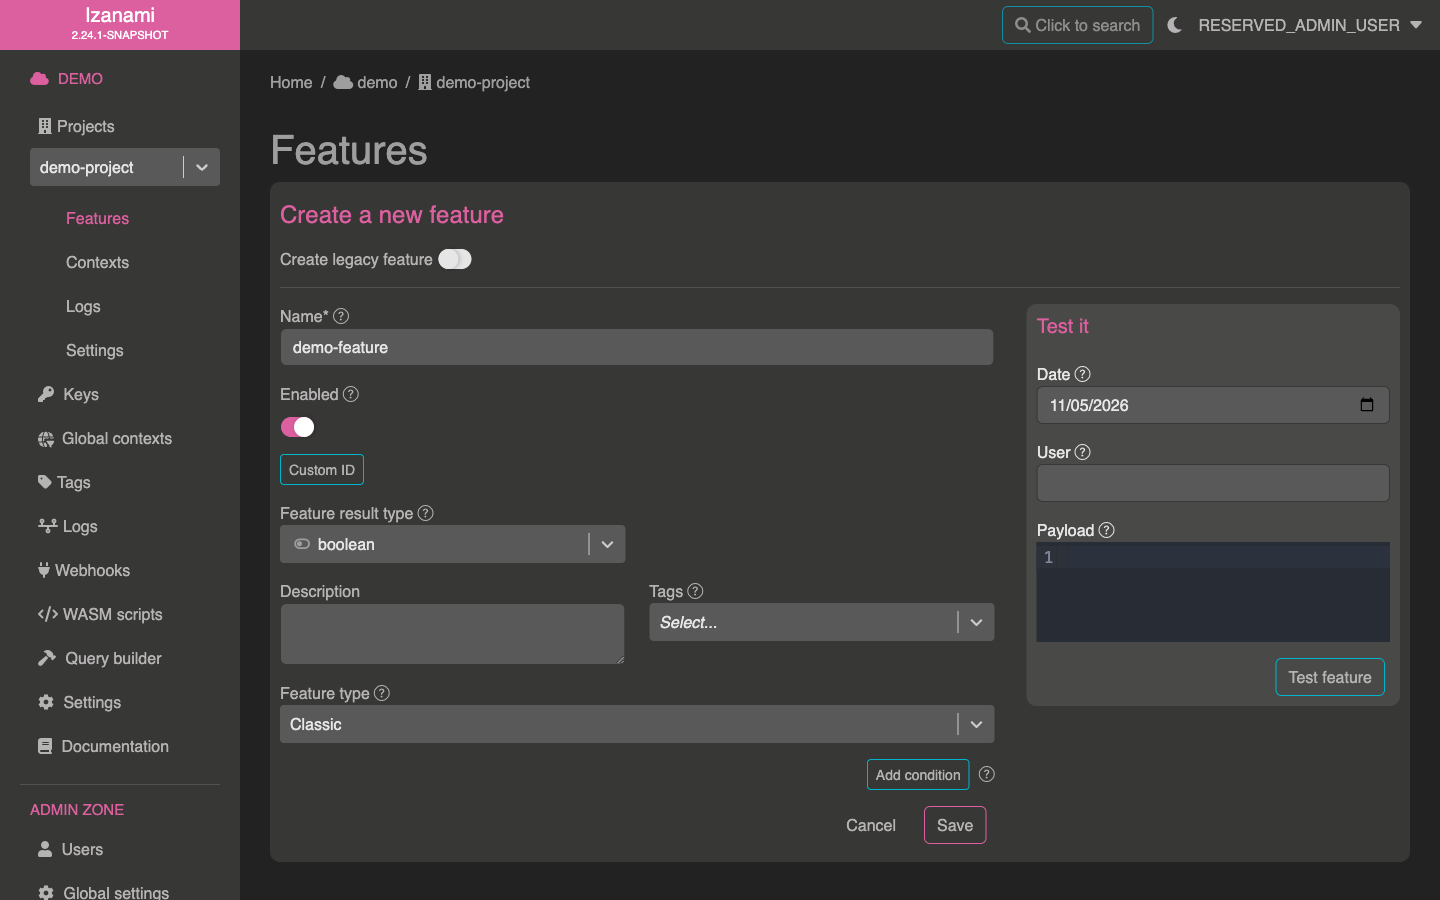
Create your first feature
Now that we have a project, let's create our first feature. Just click on the "Create new feature" button.
In this form, feature name can contain following symbols:
- letters (uppercase or lowercase)
- numbers
-,_and:characters- spaces
For now, we'll keep feature as simple as possible: feature will be either active or inactive for everyone.
Check "Enabled" checkbox if you want your feature to be active, let it unchecked otherwise.
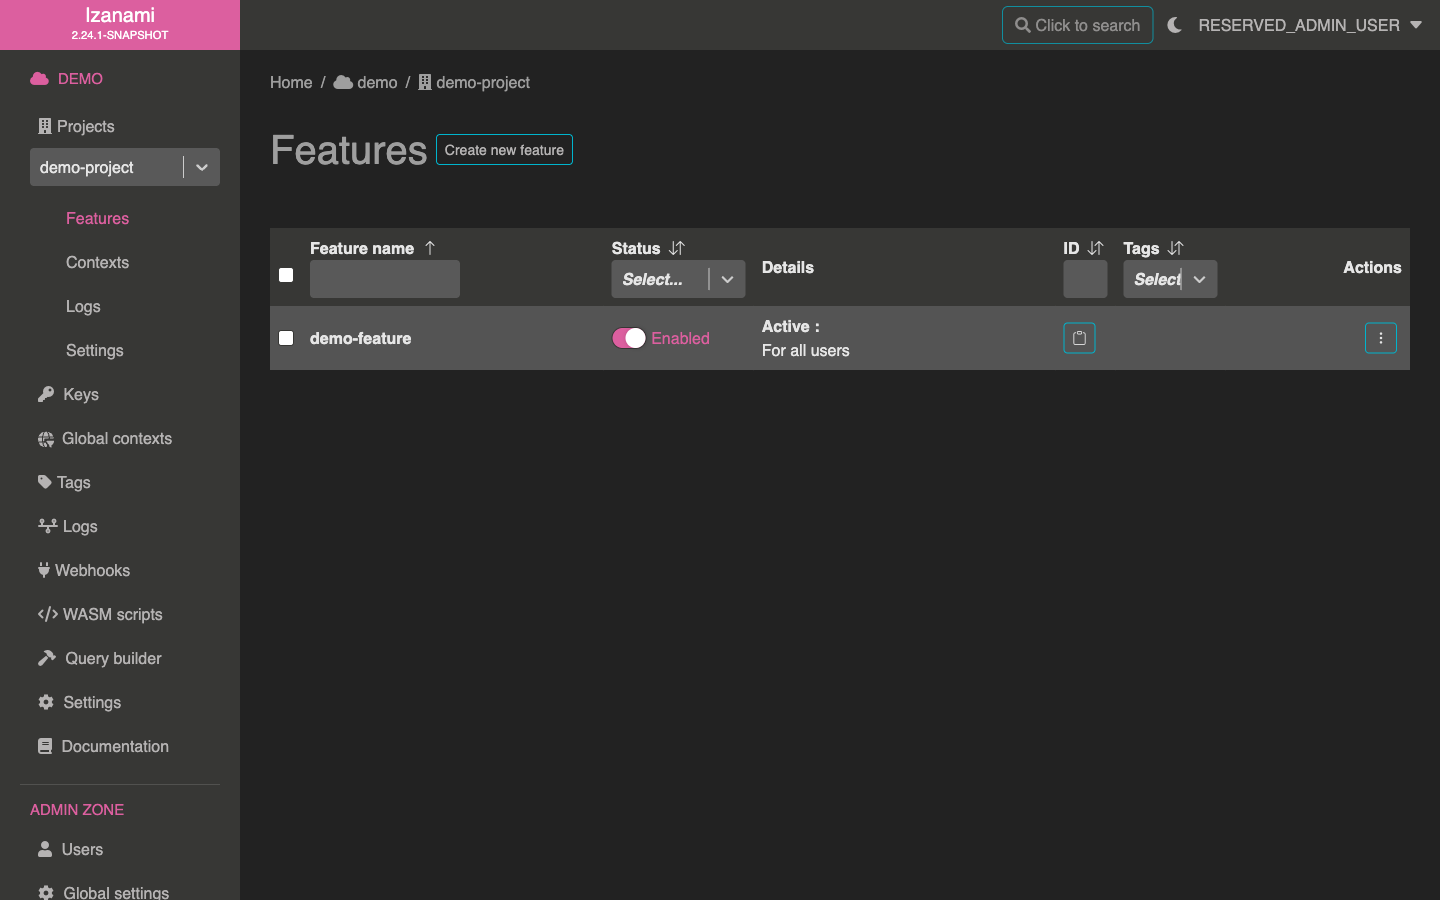
After saving this new feature, our project doesn't look that empty anymore.
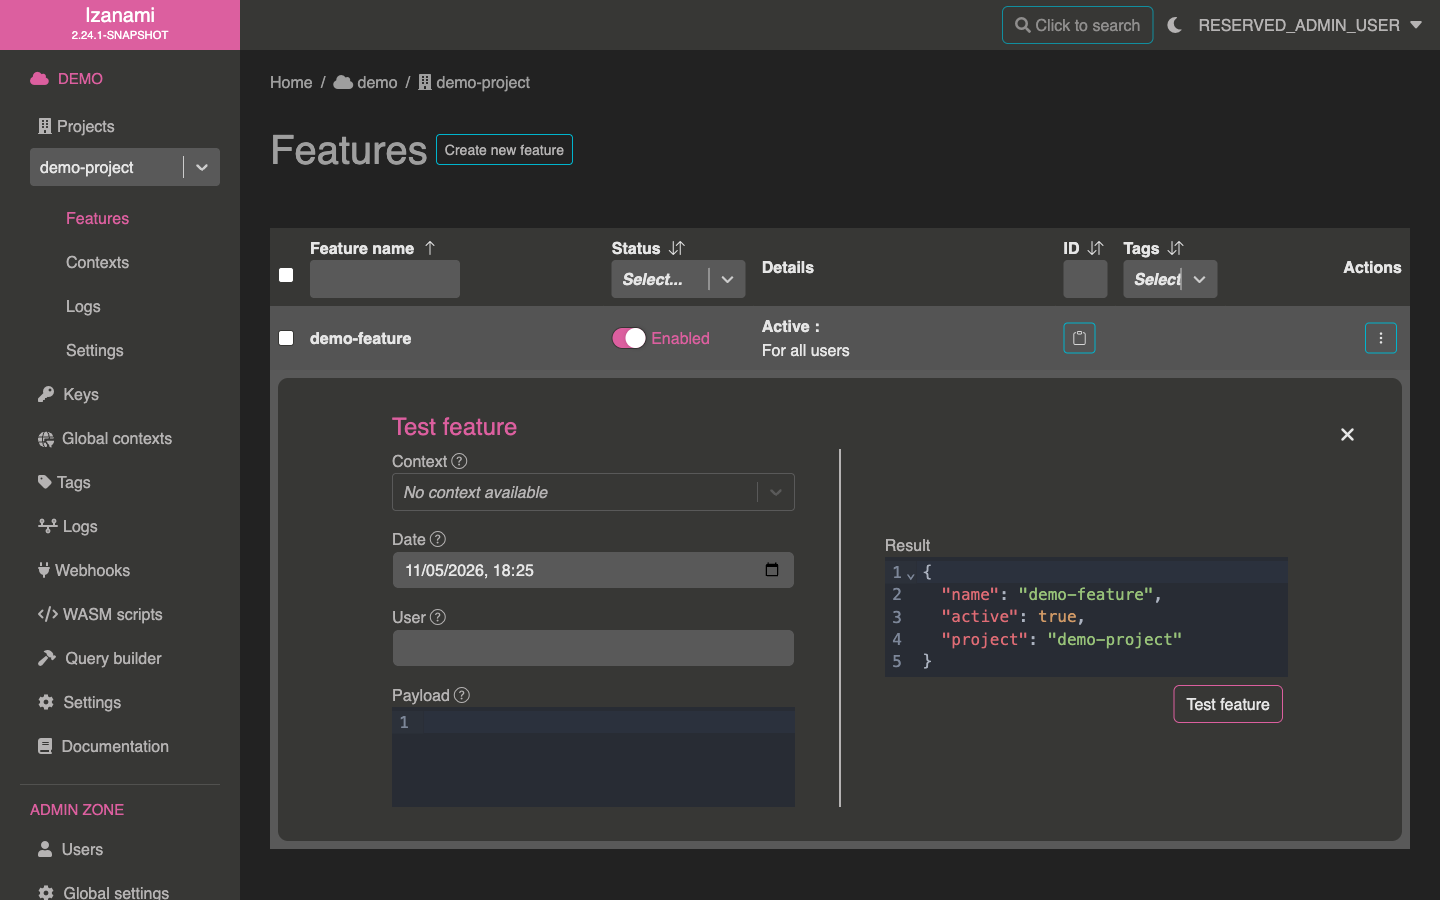
Test your feature locally
Izanami allows to test feature from backoffice. Click on action icon at the end of your feature row.
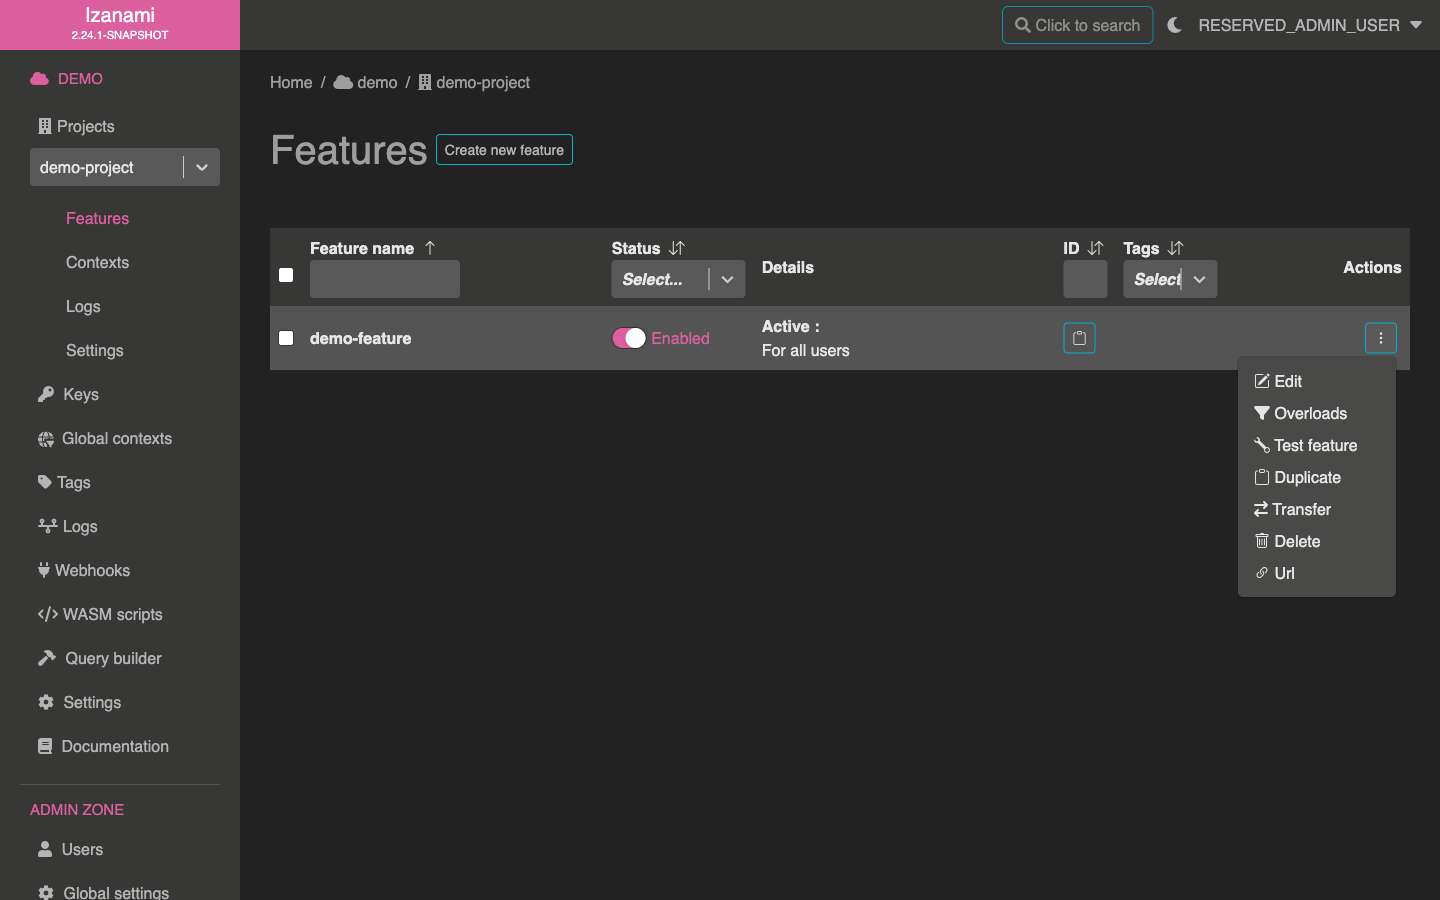
Now click on "Test Feature" item to display test form.
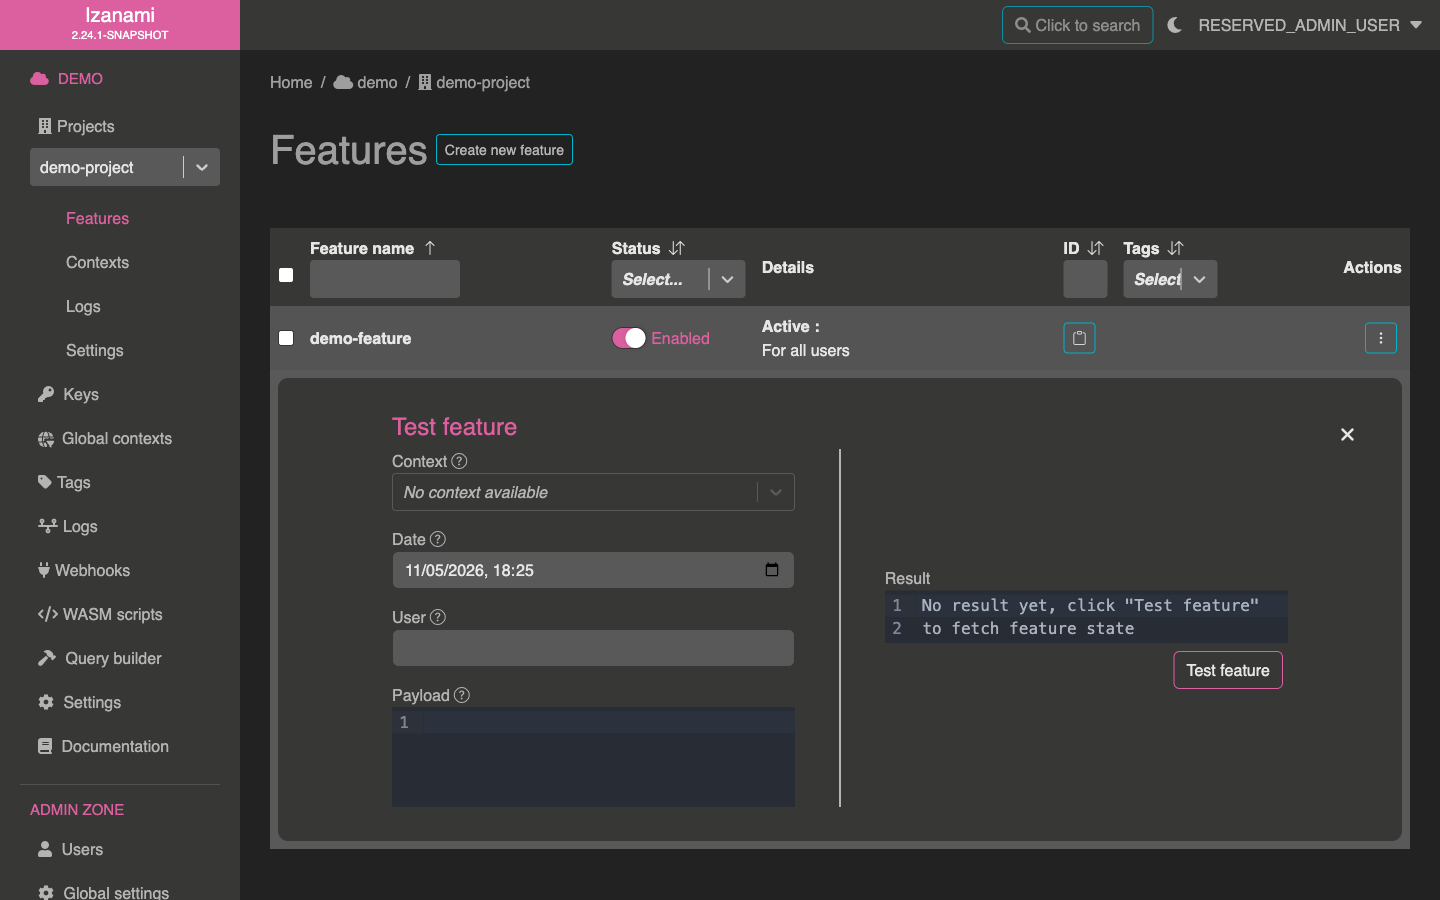
This form allows to specify several query parameters, but we don't need it right now, just click on the test button.
A result textbox will appear indicating if feature is currently active or not.
Querying your feature
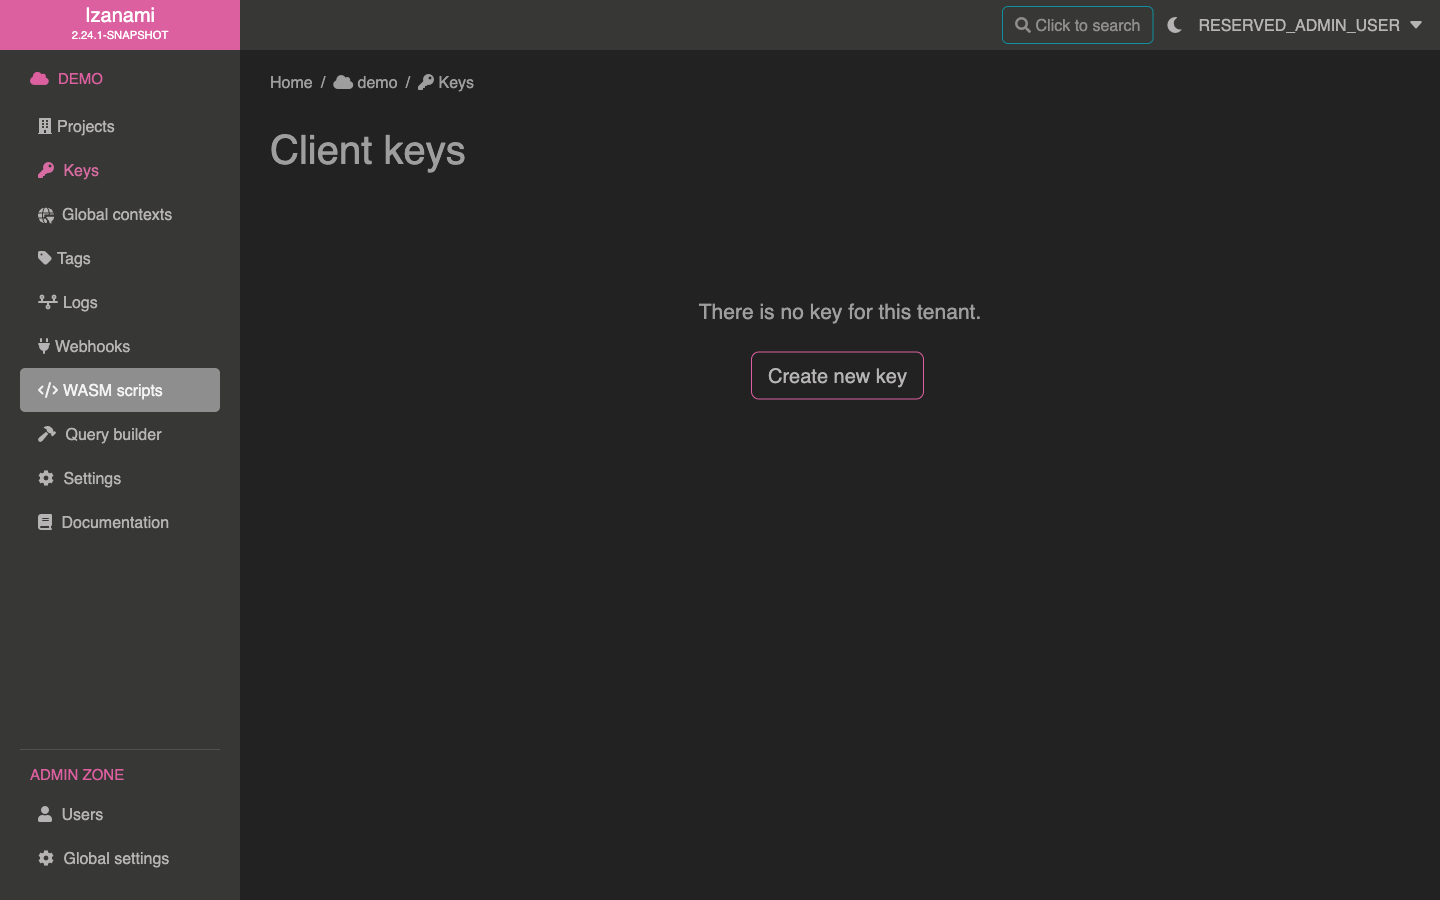
To query feature state from external application, we'll need to create a client key.

Creating an API key
First let's go to the API key screen, click on "Keys" entry of left menu.
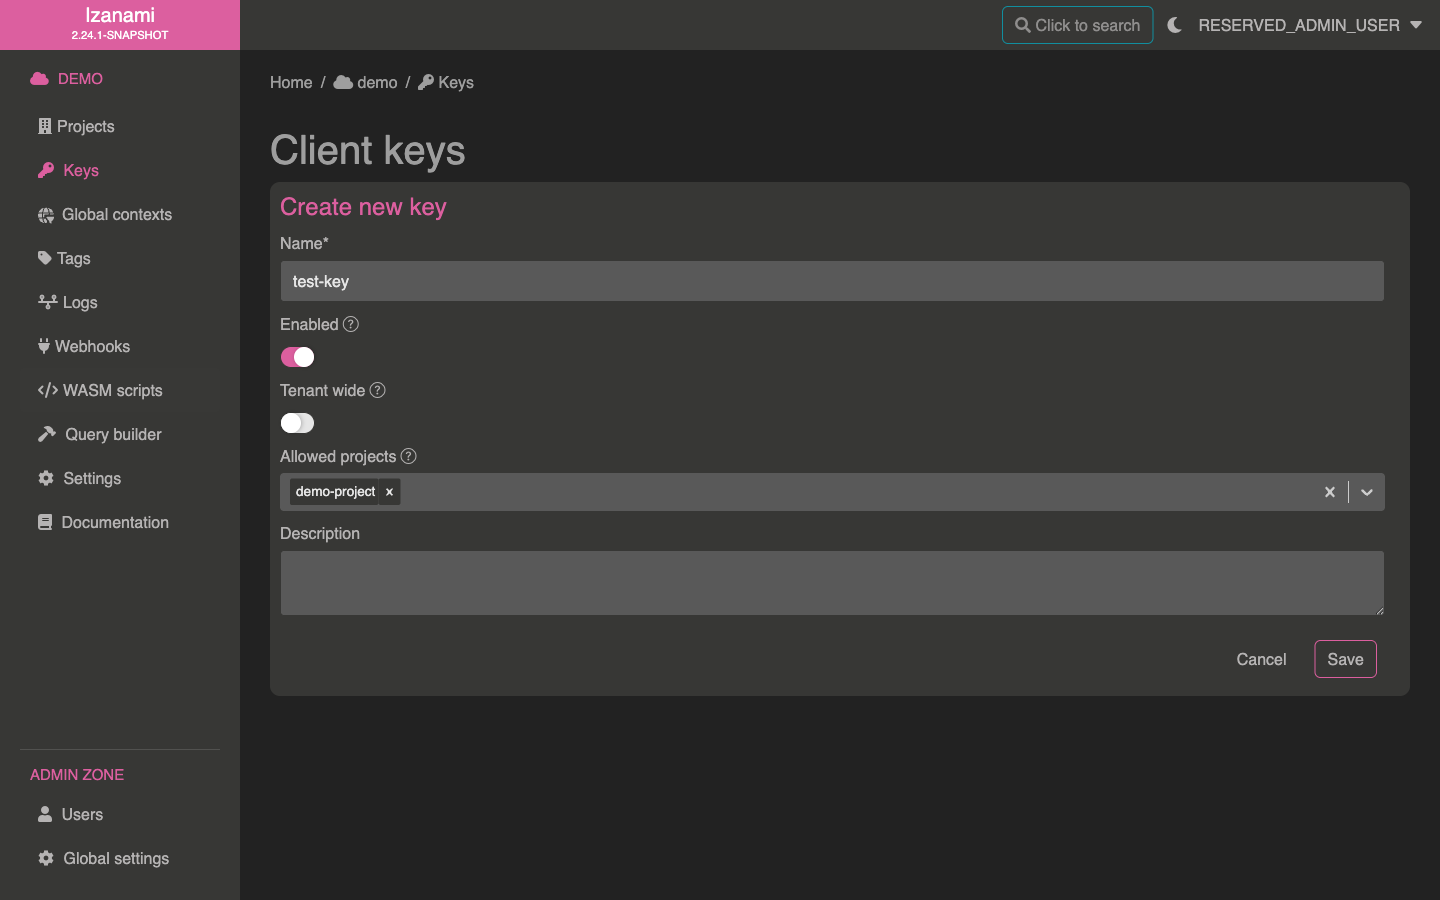
Click on "Create new key" to display key creation form. Key name can contain following symbols:
- letters (uppercase or lowercase)
- numbers
-and_characters
You'll also need to select allowed projects in select. Alternatively, you can check "admin" checkbox.
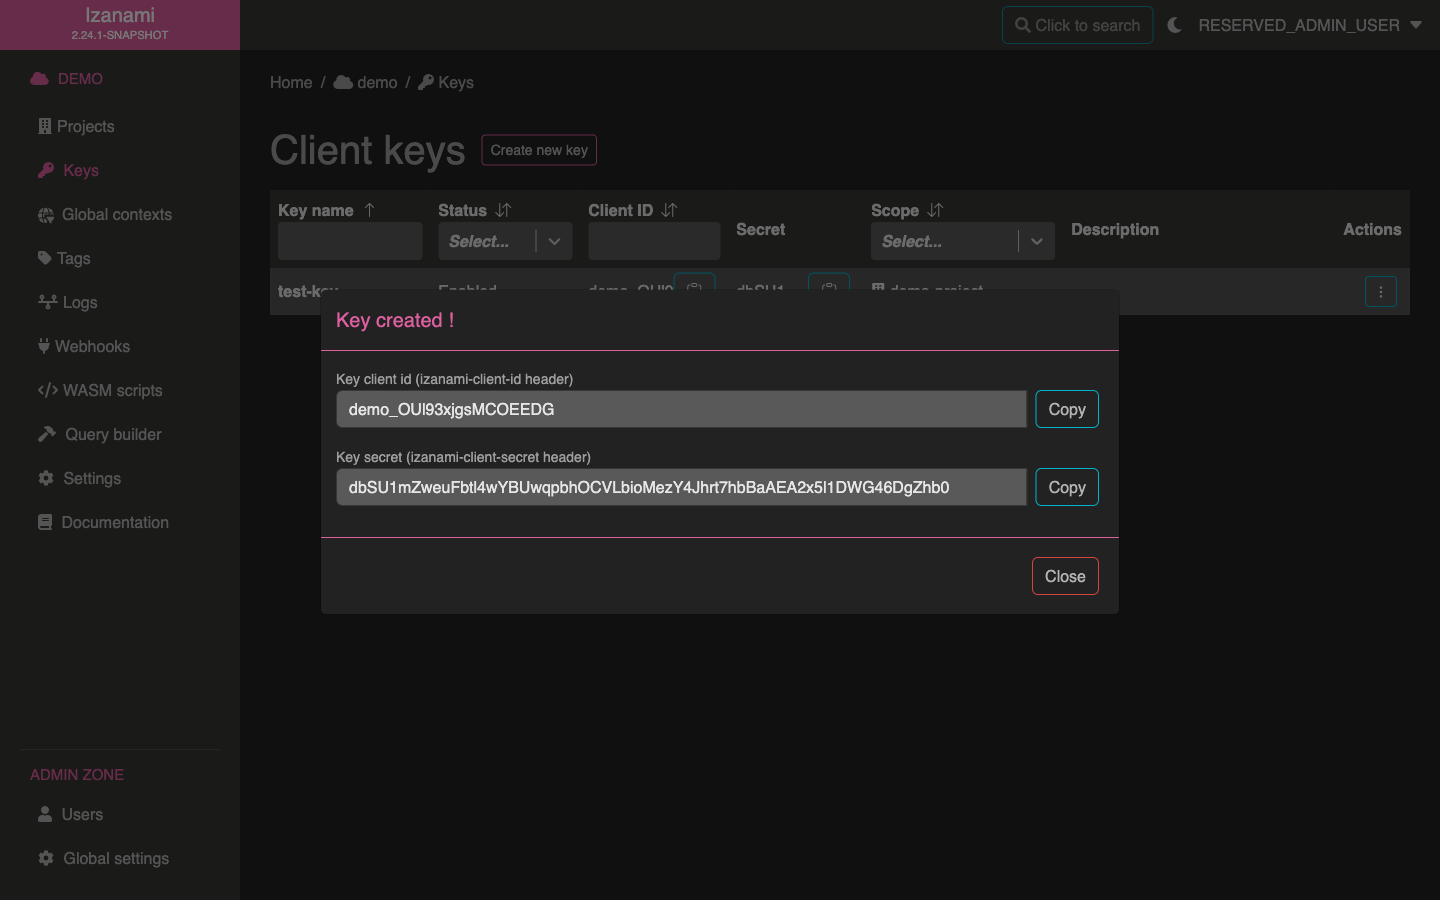
Once your key is created, a popup will display associated client id and secret.
Retrieving request URL
To retrieve feature call URL, you'll need to get back to your project. To do this click on "Projects" item on left menu, and then click on your project.
Once you are back on your project screen, click on the link icon on your feature row.
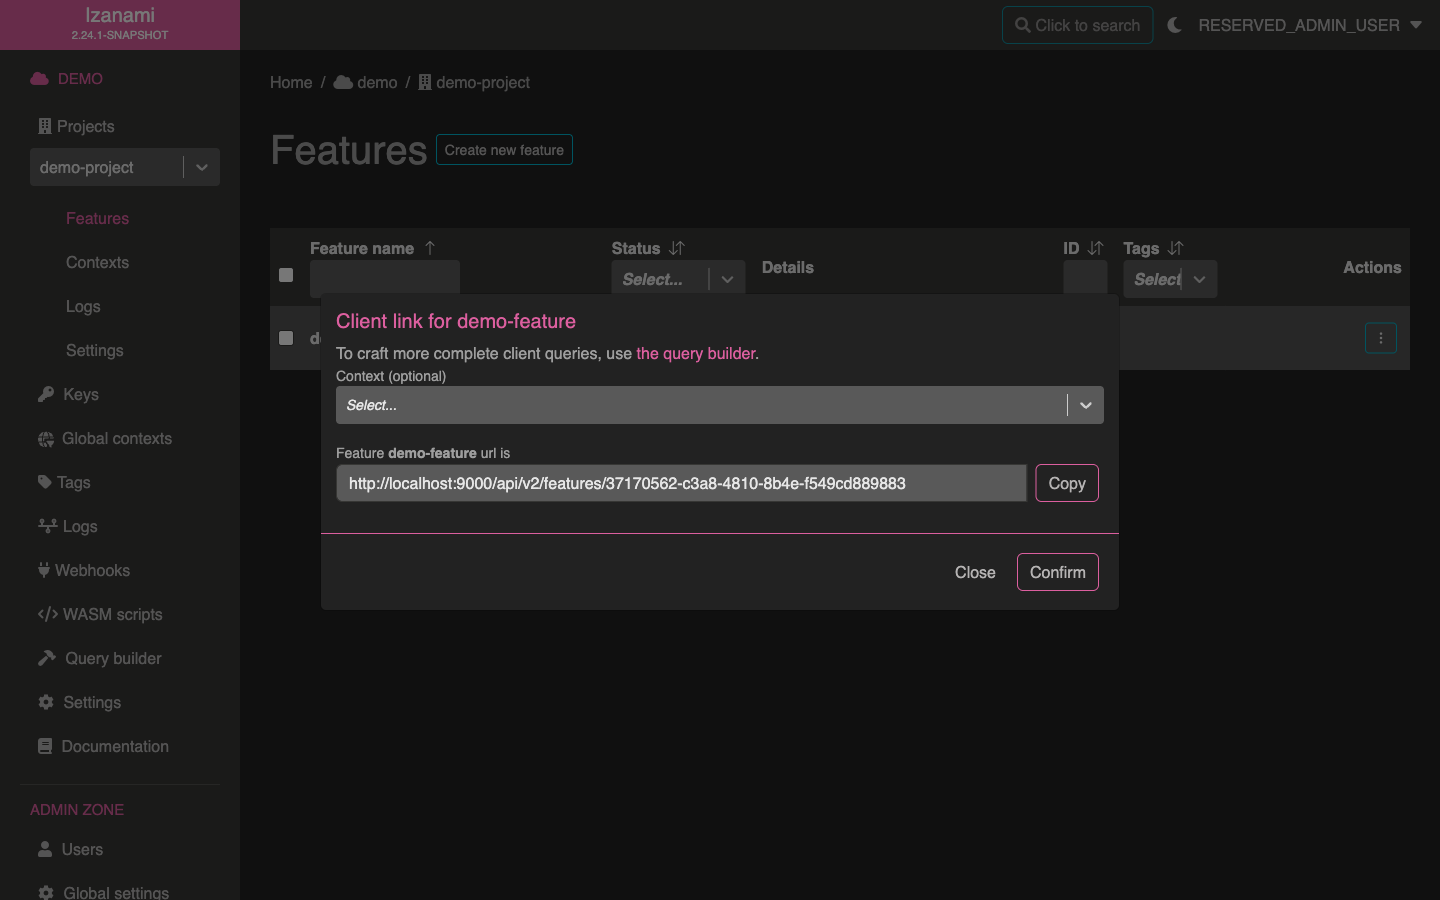
Click the "copy" button to copy feature URL.
Izanami is using technical ID in URL. The reason it's not using feature name is to allow changing feature names without breaking client calls
Requesting using curl
You've got everything you need to query your feature from curl.
  curl -H "izanami-client-id: <YOUR CLIENT ID>" \
  -H "izanami-client-secret: <YOUR CLIENT SECRET>" \
  <FEATURE URL>
While requesting Izanami directly from HTTP is perfectly fine, it may be a better idea to use one of our client, which offers some nice and built-in resilience and performance features.