Setup Otoroshi
in this section we are going to configure otoroshi before running it for the first time
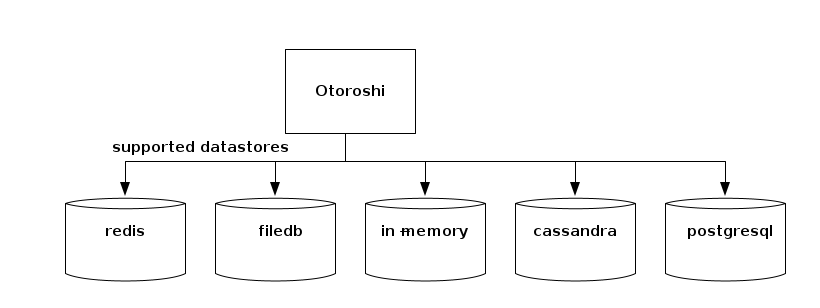
Setup the database
Right now, Otoroshi supports multiple datastore. You can choose one datastore over another depending on your use case.
Redis
RecommendedThe redis datastore is quite nice when you want to easily deploy several Otoroshi instances.

In memory
The in-memory datastore is kind of interesting. It can be used for testing purposes, but it is also a good candidate for production because of its fastness.


Postgresql
ClusteringOr any postgresql compatible database like cockroachdb for instance (experimental support, should be used in cluster mode for leaders)

FileDB
The filedb datastore is pretty handy for testing purposes, but is not supposed to be used in production mode. Not suitable for production usage.

the first thing to setup is what kind of datastore you want to use with the otoroshi.storage setting
otoroshi {
  storage = "inmemory" # the storage used by otoroshi. possible values are lettuce (for redis), inmemory, file, http, s3, cassandra, postgresql
  storage = ${?APP_STORAGE} # the storage used by otoroshi. possible values are lettuce (for redis), inmemory, file, http, s3, cassandra, postgresql
  storage = ${?OTOROSHI_STORAGE} # the storage used by otoroshi. possible values are lettuce (for redis), inmemory, file, http, s3, cassandra, postgresql
}
depending on the value you chose, you will be able to configure your datastore with the following configuration
- In memory
- Redis
- PostgreSQL
- Cassandra
- File
- HTTP
- S3
otoroshi {
  storage = "inmemory"
  inmemory { # configuration to fetch/store otoroshi state in memory
    windowSize = 99
    windowSize = ${?INMEMORY_WINDOW_SIZE}
    windowSize = ${?OTOROSHI_INMEMORY_WINDOW_SIZE}
    experimental = false
    experimental = ${?INMEMORY_EXPERIMENTAL_STORE}
    experimental = ${?OTOROSHI_INMEMORY_EXPERIMENTAL_STORE}
    optimized = false
    optimized = ${?INMEMORY_OPTIMIZED}
    optimized = ${?OTOROSHI_INMEMORY_OPTIMIZED}
    modern = false
    modern =  ${?INMEMORY_MODERN}
    modern =  ${?OTOROSHI_INMEMORY_MODERN}
  }
}
otoroshi {
  storage = "lettuce"
  redis {
    lettuce { # configuration to fetch/store otoroshi state from a redis datastore using the lettuce driver (the next default one)
      connection = "default"
      connection = ${?REDIS_LETTUCE_CONNECTION}
      connection = ${?OTOROSHI_REDIS_LETTUCE_CONNECTION}
      uri =  ${?REDIS_LETTUCE_URI}
      uri =  ${?OTOROSHI_REDIS_LETTUCE_URI}
      uri =  ${?REDIS_URL}
      uri =  ${?OTOROSHI_REDIS_URL}
      uris = []
      urisStr = ${?REDIS_LETTUCE_URIS}
      urisStr = ${?OTOROSHI_REDIS_LETTUCE_URIS}
      readFrom = "MASTER_PREFERRED"
      readFrom = ${?REDIS_LETTUCE_READ_FROM}
      readFrom = ${?OTOROSHI_REDIS_LETTUCE_READ_FROM}
      startTLS = false
      startTLS = ${?REDIS_LETTUCE_START_TLS}
      startTLS = ${?OTOROSHI_REDIS_LETTUCE_START_TLS}
      verifyPeers = true
      verifyPeers = ${?REDIS_LETTUCE_VERIFY_PEERS}
      verifyPeers = ${?OTOROSHI_REDIS_LETTUCE_VERIFY_PEERS}
    }
  }
}
otoroshi {
  # postrgesql settings. everything possible with the client
  # WARNING: this is an experimental support and everything might not work as expected !!!
  storage = "postgresql"
  pg {
    uri = ${?PG_URI}
    uri = ${?OTOROSHI_PG_URI}
    uri = ${?POSTGRESQL_ADDON_URI}
    uri = ${?OTOROSHI_POSTGRESQL_ADDON_URI}
    poolSize = 20
    poolSize = ${?PG_POOL_SIZE}
    poolSize = ${?OTOROSHI_PG_POOL_SIZE}
    port = 5432
    port = ${?PG_PORT}
    port = ${?OTOROSHI_PG_PORT}
    host = "localhost"
    host = ${?PG_HOST}
    host = ${?OTOROSHI_PG_HOST}
    database = "otoroshi"
    database = ${?PG_DATABASE}
    database = ${?OTOROSHI_PG_DATABASE}
    user = "otoroshi"
    user = ${?PG_USER}
    user = ${?OTOROSHI_PG_USER}
    password = "otoroshi"
    password = ${?PG_PASSWORD}
    password = ${?OTOROSHI_PG_PASSWORD}
    logQueries = ${?PG_DEBUG_QUERIES}
    logQueries = ${?OTOROSHI_PG_DEBUG_QUERIES}
    avoidJsonPath = false
    avoidJsonPath = ${?PG_AVOID_JSON_PATH}
    avoidJsonPath = ${?OTOROSHI_PG_AVOID_JSON_PATH}
    optimized = true
    optimized = ${?PG_OPTIMIZED}
    optimized = ${?OTOROSHI_PG_OPTIMIZED}
    connect-timeout = ${?PG_CONNECT_TIMEOUT}
    connect-timeout = ${?OTOROSHI_PG_CONNECT_TIMEOUT}
    idle-timeout = ${?PG_IDLE_TIMEOUT}
    idle-timeout = ${?OTOROSHI_PG_IDLE_TIMEOUT}
    log-activity = ${?PG_LOG_ACTIVITY}
    log-activity = ${?OTOROSHI_PG_LOG_ACTIVITY}
    pipelining-limit = ${?PG_PIPELINING_LIMIT}
    pipelining-limit = ${?OTOROSHI_PG_PIPELINING_LIMIT}
    ssl {
      enabled = false
      enabled = ${?PG_SSL_ENABLED}
      enabled = ${?OTOROSHI_PG_SSL_ENABLED}
      mode = "verify_ca"
      mode = ${?PG_SSL_MODE}
      mode = ${?OTOROSHI_PG_SSL_MODE}
      trusted-certs-path = []
      trusted-certs = []
      trusted-cert-path = ${?PG_SSL_TRUSTED_CERT_PATH}
      trusted-cert-path = ${?OTOROSHI_PG_SSL_TRUSTED_CERT_PATH}
      trusted-cert = ${?PG_SSL_TRUSTED_CERT}
      trusted-cert = ${?OTOROSHI_PG_SSL_TRUSTED_CERT}
      client-certs-path = []
      client-certs = []
      client-cert-path = ${?PG_SSL_CLIENT_CERT_PATH}
      client-cert-path = ${?OTOROSHI_PG_SSL_CLIENT_CERT_PATH}
      client-cert = ${?PG_SSL_CLIENT_CERT}
      client-cert = ${?OTOROSHI_PG_SSL_CLIENT_CERT}
      trust-all = ${?PG_SSL_TRUST_ALL}
      trust-all = ${?OTOROSHI_PG_SSL_TRUST_ALL}
    }
  }
}
otoroshi {
  storage = "cassandra"
  cassandra { # cassandra settings. everything possible with the client
    windowSize = 99
    windowSize = ${?CASSANDRA_WINDOW_SIZE}
    windowSize = ${?OTOROSHI_CASSANDRA_WINDOW_SIZE}
    host = "127.0.0.1"
    host = ${?CASSANDRA_HOST}
    host = ${?OTOROSHI_CASSANDRA_HOST}
    port = 9042
    port = ${?CASSANDRA_PORT}
    port = ${?OTOROSHI_CASSANDRA_PORT}
    replicationFactor = 1
    replicationFactor = ${?CASSANDRA_REPLICATION_FACTOR}
    replicationFactor = ${?OTOROSHI_CASSANDRA_REPLICATION_FACTOR}
    replicationOptions = ${?CASSANDRA_REPLICATION_OPTIONS}
    replicationOptions = ${?OTOROSHI_CASSANDRA_REPLICATION_OPTIONS}
    durableWrites = true
    durableWrites = ${?CASSANDRA_DURABLE_WRITES}
    durableWrites = ${?OTOROSHI_CASSANDRA_DURABLE_WRITES}
    basic.contact-points = [ ${otoroshi.cassandra.host}":"${otoroshi.cassandra.port} ]
    basic.session-name = "otoroshi"
    basic.session-name = ${?OTOROSHI_CASSANDRA_SESSION_NAME}
    basic.session-keyspace = ${?OTOROSHI_CASSANDRA_SESSION_KEYSPACE}
    basic.config-reload-interval = 5 minutes
    basic.request {
      timeout = 10 seconds
      consistency = LOCAL_ONE
      consistency = ${?OTOROSHI_CASSANDRA_CONSISTENCY}
      page-size = 5000
      page-size = ${?OTOROSHI_CASSANDRA_PAGE_SIZE}
      serial-consistency = SERIAL
      serial-consistency = ${?OTOROSHI_CASSANDRA_SERIAL_CONSISTENCY}
      default-idempotence = false
      default-idempotence = ${?OTOROSHI_CASSANDRA_DEFAULT_IDEMPOTENCE}
    }
    basic.load-balancing-policy {
      class = DefaultLoadBalancingPolicy
      local-datacenter = datacenter1
      local-datacenter = ${?OTOROSHI_CASSANDRA_LOCAL_DATACENTER}
      # filter.class=
      slow-replica-avoidance = true
    }
    basic.cloud {
      # secure-connect-bundle = /location/of/secure/connect/bundle
    }
    basic.application {
      # name =
      # version =
    }
    basic.graph {
      # name = your-graph-name
      traversal-source = "g"
      # is-system-query = false
      # read-consistency-level = LOCAL_QUORUM
      # write-consistency-level = LOCAL_ONE
      # timeout = 10 seconds
    }
    advanced.connection {
      connect-timeout = 5 seconds
      init-query-timeout = 500 milliseconds
      set-keyspace-timeout = ${datastax-java-driver.advanced.connection.init-query-timeout}
      pool {
        local {
          size = 1
        }
        remote {
          size = 1
        }
      }
      max-requests-per-connection = 1024
      max-orphan-requests = 256
      warn-on-init-error = true
    }
    advanced.reconnect-on-init = false
    advanced.reconnection-policy {
      class = ExponentialReconnectionPolicy
      base-delay = 1 second
      max-delay = 60 seconds
    }
    advanced.retry-policy {
      class = DefaultRetryPolicy
    }
    advanced.speculative-execution-policy {
      class = NoSpeculativeExecutionPolicy
      # max-executions = 3
      # delay = 100 milliseconds
    }
    advanced.auth-provider {
      # class = PlainTextAuthProvider
      username = ${?CASSANDRA_USERNAME}
      username = ${?OTOROSHI_CASSANDRA_USERNAME}
      password = ${?CASSANDRA_PASSWORD}
      password = ${?OTOROSHI_CASSANDRA_PASSWORD}
      authorization-id = ${?OTOROSHI_CASSANDRA_AUTHORIZATION_ID}
      //service = "cassandra"
      # login-configuration {
      #   principal = "cassandra@DATASTAX.COM"
      #   useKeyTab = "true"
      #   refreshKrb5Config = "true"
      #   keyTab = "/path/to/keytab/file"
      # }
      # sasl-properties {
      #   javax.security.sasl.qop = "auth-conf"
      # }
    }
    advanced.ssl-engine-factory {
      # class = DefaultSslEngineFactory
      # cipher-suites = [ "TLS_RSA_WITH_AES_128_CBC_SHA", "TLS_RSA_WITH_AES_256_CBC_SHA" ]
      # hostname-validation = true
      # truststore-path = /path/to/client.truststore
      # truststore-password = password123
      # keystore-path = /path/to/client.keystore
      # keystore-password = password123
    }
    advanced.timestamp-generator {
      class = AtomicTimestampGenerator
      drift-warning {
        threshold = 1 second
        interval = 10 seconds
      }
      force-java-clock = false
    }
    advanced.request-tracker {
      class = NoopRequestTracker
      logs {
        # success.enabled = true
        slow {
          # threshold = 1 second
          # enabled = true
        }
        # error.enabled = true
        # max-query-length = 500
        # show-values = true
        # max-value-length = 50
        # max-values = 50
        # show-stack-traces = true
      }
    }
    advanced.throttler {
      class = PassThroughRequestThrottler
      # max-queue-size = 10000
      # max-concurrent-requests = 10000
      # max-requests-per-second = 10000
      # drain-interval = 10 milliseconds
    }
    advanced.node-state-listener.class = NoopNodeStateListener
    advanced.schema-change-listener.class = NoopSchemaChangeListener
    advanced.address-translator {
      class = PassThroughAddressTranslator
    }
    advanced.resolve-contact-points = true
    advanced.protocol {
      version = V4
      version = ${?OTOROSHI_CASSANDRA_PROTOCOL_VERSION}
      compression = lz4
      compression = ${?OTOROSHI_CASSANDRA_PROTOCOL_COMPRESSION}
      max-frame-length = 256 MB
    }
    advanced.request {
      warn-if-set-keyspace = false
      trace {
        attempts = 5
        interval = 3 milliseconds
        consistency = ONE
      }
      log-warnings = true
    }
    advanced.graph {
      # sub-protocol = "graphson-2.0"
      paging-enabled = "AUTO"
      paging-options {
        page-size = ${datastax-java-driver.advanced.continuous-paging.page-size}
        max-pages = ${datastax-java-driver.advanced.continuous-paging.max-pages}
        max-pages-per-second = ${datastax-java-driver.advanced.continuous-paging.max-pages-per-second}
        max-enqueued-pages = ${datastax-java-driver.advanced.continuous-paging.max-enqueued-pages}
      }
    }
    advanced.continuous-paging {
      page-size = ${datastax-java-driver.basic.request.page-size}
      page-size-in-bytes = false
      max-pages = 0
      max-pages-per-second = 0
      max-enqueued-pages = 4
      timeout {
        first-page = 2 seconds
        other-pages = 1 second
      }
    }
    advanced.monitor-reporting {
      enabled = true
    }
    advanced.metrics {
      session {
        enabled = [
          # bytes-sent,
          # bytes-received
          # connected-nodes,
          # cql-requests,
          # cql-client-timeouts,
          # cql-prepared-cache-size,
          # throttling.delay,
          # throttling.queue-size,
          # throttling.errors,
          # continuous-cql-requests,
          # graph-requests,
          # graph-client-timeouts
        ]
        cql-requests {
          highest-latency = 3 seconds
          significant-digits = 3
          refresh-interval = 5 minutes
        }
        throttling.delay {
          highest-latency = 3 seconds
          significant-digits = 3
          refresh-interval = 5 minutes
        }
        continuous-cql-requests {
          highest-latency = 120 seconds
          significant-digits = 3
          refresh-interval = 5 minutes
        }
        graph-requests {
          highest-latency = 12 seconds
          significant-digits = 3
          refresh-interval = 5 minutes
        }
      }
      node {
        enabled = [
          # pool.open-connections,
          # pool.available-streams,
          # pool.in-flight,
          # pool.orphaned-streams,
          # bytes-sent,
          # bytes-received,
          # cql-messages,
          # errors.request.unsent,
          # errors.request.aborted,
          # errors.request.write-timeouts,
          # errors.request.read-timeouts,
          # errors.request.unavailables,
          # errors.request.others,
          # retries.total,
          # retries.aborted,
          # retries.read-timeout,
          # retries.write-timeout,
          # retries.unavailable,
          # retries.other,
          # ignores.total,
          # ignores.aborted,
          # ignores.read-timeout,
          # ignores.write-timeout,
          # ignores.unavailable,
          # ignores.other,
          # speculative-executions,
          # errors.connection.init,
          # errors.connection.auth,
          # graph-messages,
        ]
        cql-messages {
          highest-latency = 3 seconds
          significant-digits = 3
          refresh-interval = 5 minutes
        }
        graph-messages {
          highest-latency = 3 seconds
          significant-digits = 3
          refresh-interval = 5 minutes
        }
      }
    }
    advanced.socket {
      tcp-no-delay = true
      //keep-alive = false
      //reuse-address = true
      //linger-interval = 0
      //receive-buffer-size = 65535
      //send-buffer-size = 65535
    }
    advanced.heartbeat {
      interval = 30 seconds
      timeout = ${datastax-java-driver.advanced.connection.init-query-timeout}
    }
    advanced.metadata {
      topology-event-debouncer {
        window = 1 second
        max-events = 20
      }
      schema {
        enabled = true
        # refreshed-keyspaces = [ "ks1", "ks2" ]
        request-timeout = ${datastax-java-driver.basic.request.timeout}
        request-page-size = ${datastax-java-driver.basic.request.page-size}
        debouncer {
          window = 1 second
          max-events = 20
        }
      }
      token-map.enabled = true
    }
    advanced.control-connection {
      timeout = ${datastax-java-driver.advanced.connection.init-query-timeout}
      schema-agreement {
        interval = 200 milliseconds
        timeout = 10 seconds
        warn-on-failure = true
      }
    }
    advanced.prepared-statements {
      prepare-on-all-nodes = true
      reprepare-on-up {
        enabled = true
        check-system-table = false
        max-statements = 0
        max-parallelism = 100
        timeout = ${datastax-java-driver.advanced.connection.init-query-timeout}
      }
    }
    advanced.netty {
      daemon = false
      io-group {
        size = 0
        shutdown {quiet-period = 2, timeout = 15, unit = SECONDS}
      }
      admin-group {
        size = 2
        shutdown {quiet-period = 2, timeout = 15, unit = SECONDS}
      }
      timer {
        tick-duration = 100 milliseconds
        ticks-per-wheel = 2048
      }
    }
    advanced.coalescer {
      max-runs-with-no-work = 5
      reschedule-interval = 10 microseconds
    }
  }
}
otoroshi {
  storage = "file"
  filedb { # configuration to fetch/store otoroshi state from a file
    windowSize = 99
    windowSize = ${?FILEDB_WINDOW_SIZE}
    windowSize = ${?OTOROSHI_FILEDB_WINDOW_SIZE}
    path = "./filedb/state.ndjson"
    path = ${?FILEDB_PATH}
    path = ${?OTOROSHI_FILEDB_PATH}
  }
}
otoroshi {
  storage = "http"
  httpdb { # configuration to fetch/store otoroshi state from an http endpoint
    url = "http://127.0.0.1:8888/worker-0/state.json"
    headers = {}
    timeout = 10000
    pollEvery = 10000
  }
}
otoroshi {
  storage = "s3"
  s3db { # configuration to fetch/store otoroshi state from a S3 bucket
    bucket = "otoroshi-states"
    bucket = ${?OTOROSHI_DB_S3_BUCKET}
    endpoint = "https://otoroshi-states.foo.bar"
    endpoint = ${?OTOROSHI_DB_S3_ENDPOINT}
    region = "eu-west-1"
    region = ${?OTOROSHI_DB_S3_REGION}
    access = "secret"
    access = ${?OTOROSHI_DB_S3_ACCESS}
    secret = "secret"
    secret = ${?OTOROSHI_DB_S3_SECRET}
    key = "/otoroshi/states/state"
    key = ${?OTOROSHI_DB_S3_KEY}
    chunkSize = 8388608
    chunkSize = ${?OTOROSHI_DB_S3_CHUNK_SIZE}
    v4auth = true
    v4auth = ${?OTOROSHI_DB_S3_V4_AUTH}
    writeEvery = 60000 # write interval
    writeEvery = ${?OTOROSHI_DB_S3_WRITE_EVERY} # write interval
    acl = "Private"
    acl = ${?OTOROSHI_DB_S3_ACL}
  }
}
Setup your hosts before running
By default, Otoroshi starts with domain oto.tools that automatically targets 127.0.0.1 with no changes to your /etc/hosts file. Of course you can change the domain value, you have to add the values in your /etc/hosts file according to the setting you put in Otoroshi configuration or define the right ip address at the DNS provider level
otoroshi.domain=>mydomain.orgotoroshi.backoffice.subdomain=>otoroshiotoroshi.privateapps.subdomain=>privateappsotoroshi.adminapi.exposedSubdomain=>otoroshi-apiotoroshi.adminapi.targetSubdomain=>otoroshi-admin-internal-api
for instance if you want to change the default domain and use something like otoroshi.mydomain.org, then start otoroshi like
java -Dotoroshi.domain=mydomain.org -jar otoroshi.jar
Otoroshi cannot be accessed using http://127.0.0.1:8080 or http://localhost:8080 because Otoroshi uses Otoroshi to serve it's own UI and API. When otoroshi starts with an empty database, it will create a service descriptor for that using otoroshi.domain and the settings listed on this page and in the here that serve Otoroshi API and UI on http://otoroshi-api.${otoroshi.domain} and http://otoroshi.${otoroshi.domain}.
Once the descriptor is saved in database, if you want to change otoroshi.domain, you'll have to edit the descriptor in the database or restart Otoroshi with an empty database.
if your otoroshi instance runs behind a reverse proxy (L4 / L7) or inside a docker container where exposed ports (that you will use to access otoroshi) are not the same that the ones configured in otoroshi (http.port and https.port), you'll have to configure otoroshi exposed port to avoid bad redirection URLs when using authentication modules and other otoroshi tools. To do that, just set the values of the exposed ports in otoroshi.exposed-ports.http = $theExposedHttpPort (OTOROSHI_EXPOSED_PORTS_HTTP) and otoroshi.exposed-ports.https = $theExposedHttpsPort (OTOROSHI_EXPOSED_PORTS_HTTPS)
Setup your configuration file
There is a lot of things you can configure in Otoroshi. By default, Otoroshi provides a configuration that should be enough for testing purpose. But you'll likely need to update this configuration when you'll need to move into production.
In this page, any configuration property can be set at runtime using a -D flag when launching Otoroshi like
java -Dhttp.port=8080 -jar otoroshi.jar
or
./bin/otoroshi -Dhttp.port=8080
if you want to define your own config file and use it on an otoroshi instance, use the following flag
java -Dconfig.file=/path/to/otoroshi.conf -jar otoroshi.jar
Example of a custom. configuration file
include "application.conf"

http.port = 8080

otoroshi {
  storage = "inmemory"
  importFrom = "./my-state.json"
  env = "prod"
  domain = "oto.tools"
  rootScheme = "http"
  snowflake {
    seed = 0
  }
  events {
    maxSize = 1000
  }
  backoffice {
    subdomain = "otoroshi"
    session {
      exp = 86400000
    }
  }
  privateapps {
    subdomain = "privateapps"
    session {
      exp = 86400000
    }
  }
  adminapi {
    targetSubdomain = "otoroshi-admin-internal-api"
    exposedSubdomain = "otoroshi-api"
    defaultValues {
      backOfficeGroupId = "admin-api-group"
      backOfficeApiKeyClientId = "admin-api-apikey-id"
      backOfficeApiKeyClientSecret = "admin-api-apikey-secret"
      backOfficeServiceId = "admin-api-service"
    }
  }
  claim {
    sharedKey = "mysecret"
  }
  filedb {
    path = "./filedb/state.ndjson"
  }
}

play.http {
  session {
    secure = false
    httpOnly = true
    maxAge = 2592000000
    domain = ".oto.tools"
    cookieName = "oto-sess"
  }
}
Reference configuration
More config. options
See default configuration at
Configuration with env. variables
Eevery property in the configuration file can be overriden by an environment variable if it has env variable override written like ${?ENV_VARIABLE}).
Reference configuration for env. variables